Step-by-step instructions for automatically removing pages from PDF files
Scanned documents often contain unwanted pages such as separator sheets, cover pages,
or blank pages. With Automatic PDF Processor, you can automatically remove these
unnecessary pages.
Video tutorial: Automatically remove blank pages (with narration and optional subtitles)
Typical use cases
- Remove scanner separator sheets
- Remove blank pages from scanned documents
- Remove cover pages from standardized documents
- Remove specific page ranges
- Keep only certain pages
Step 1: Create a new profile
Create a new profile with a descriptive name such as "Remove blank pages".
Set up the monitored folder.
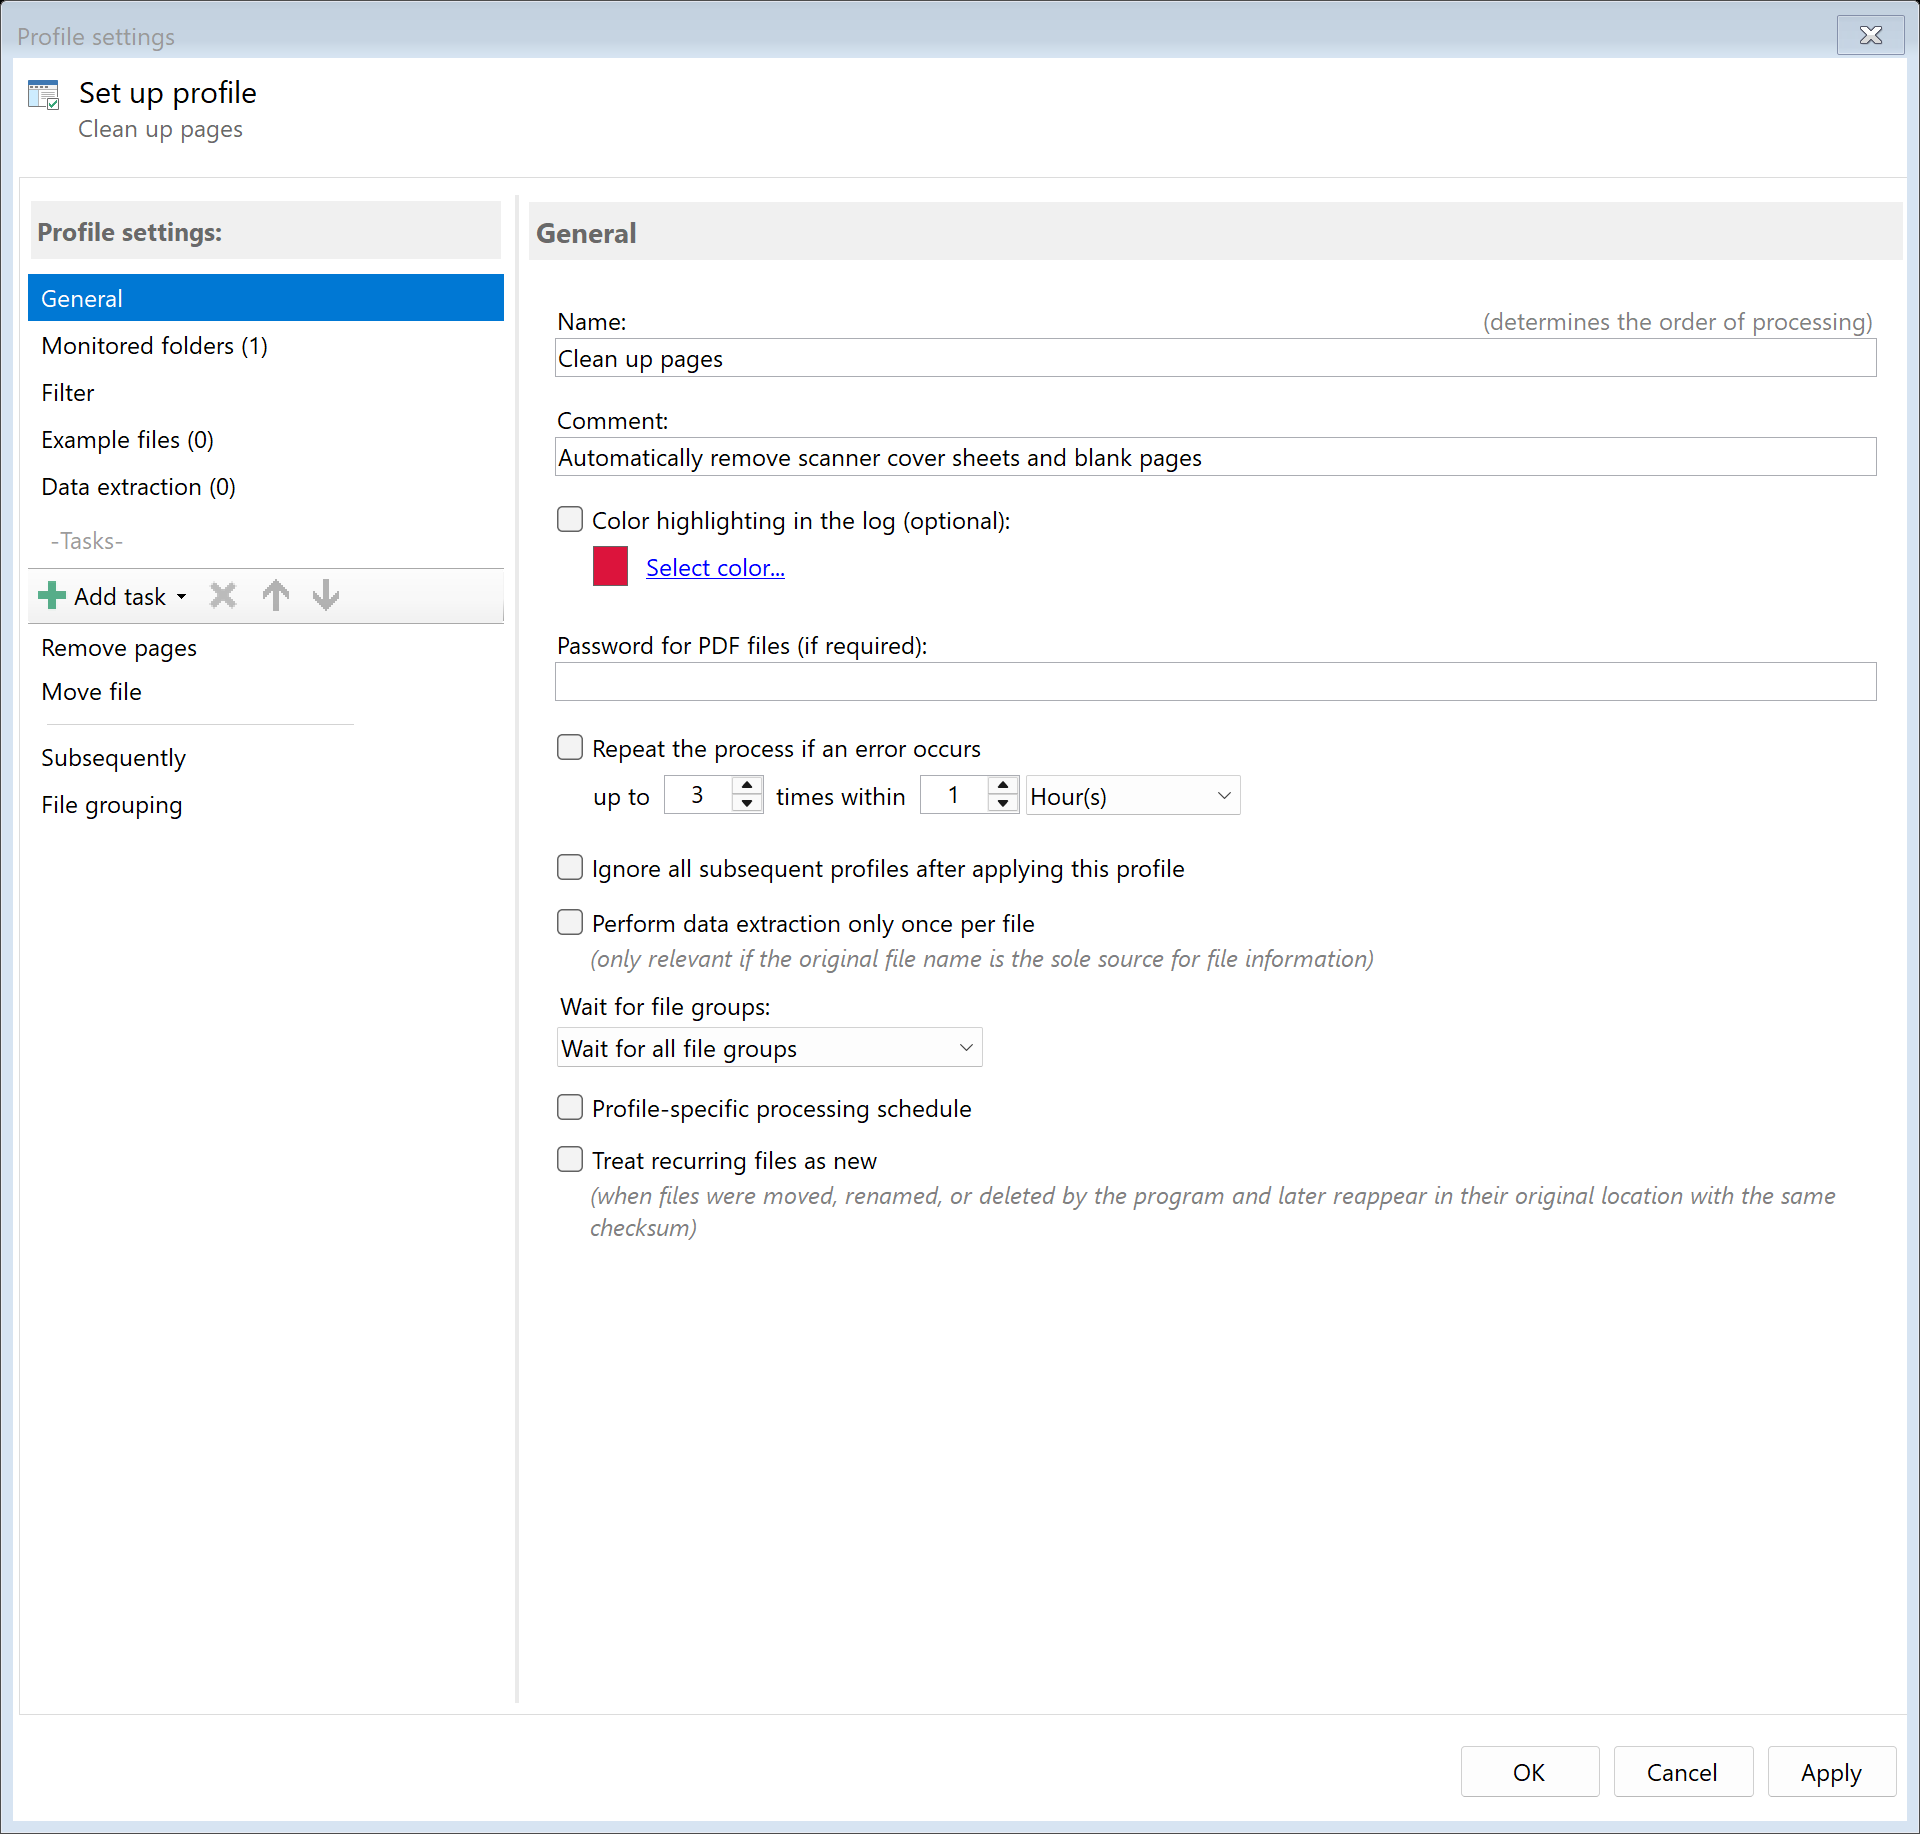
Step 2: Activate the "Remove Pages" task
Go to the task view and select the "Remove Pages" task.
Activate the task and configure the page removal settings.
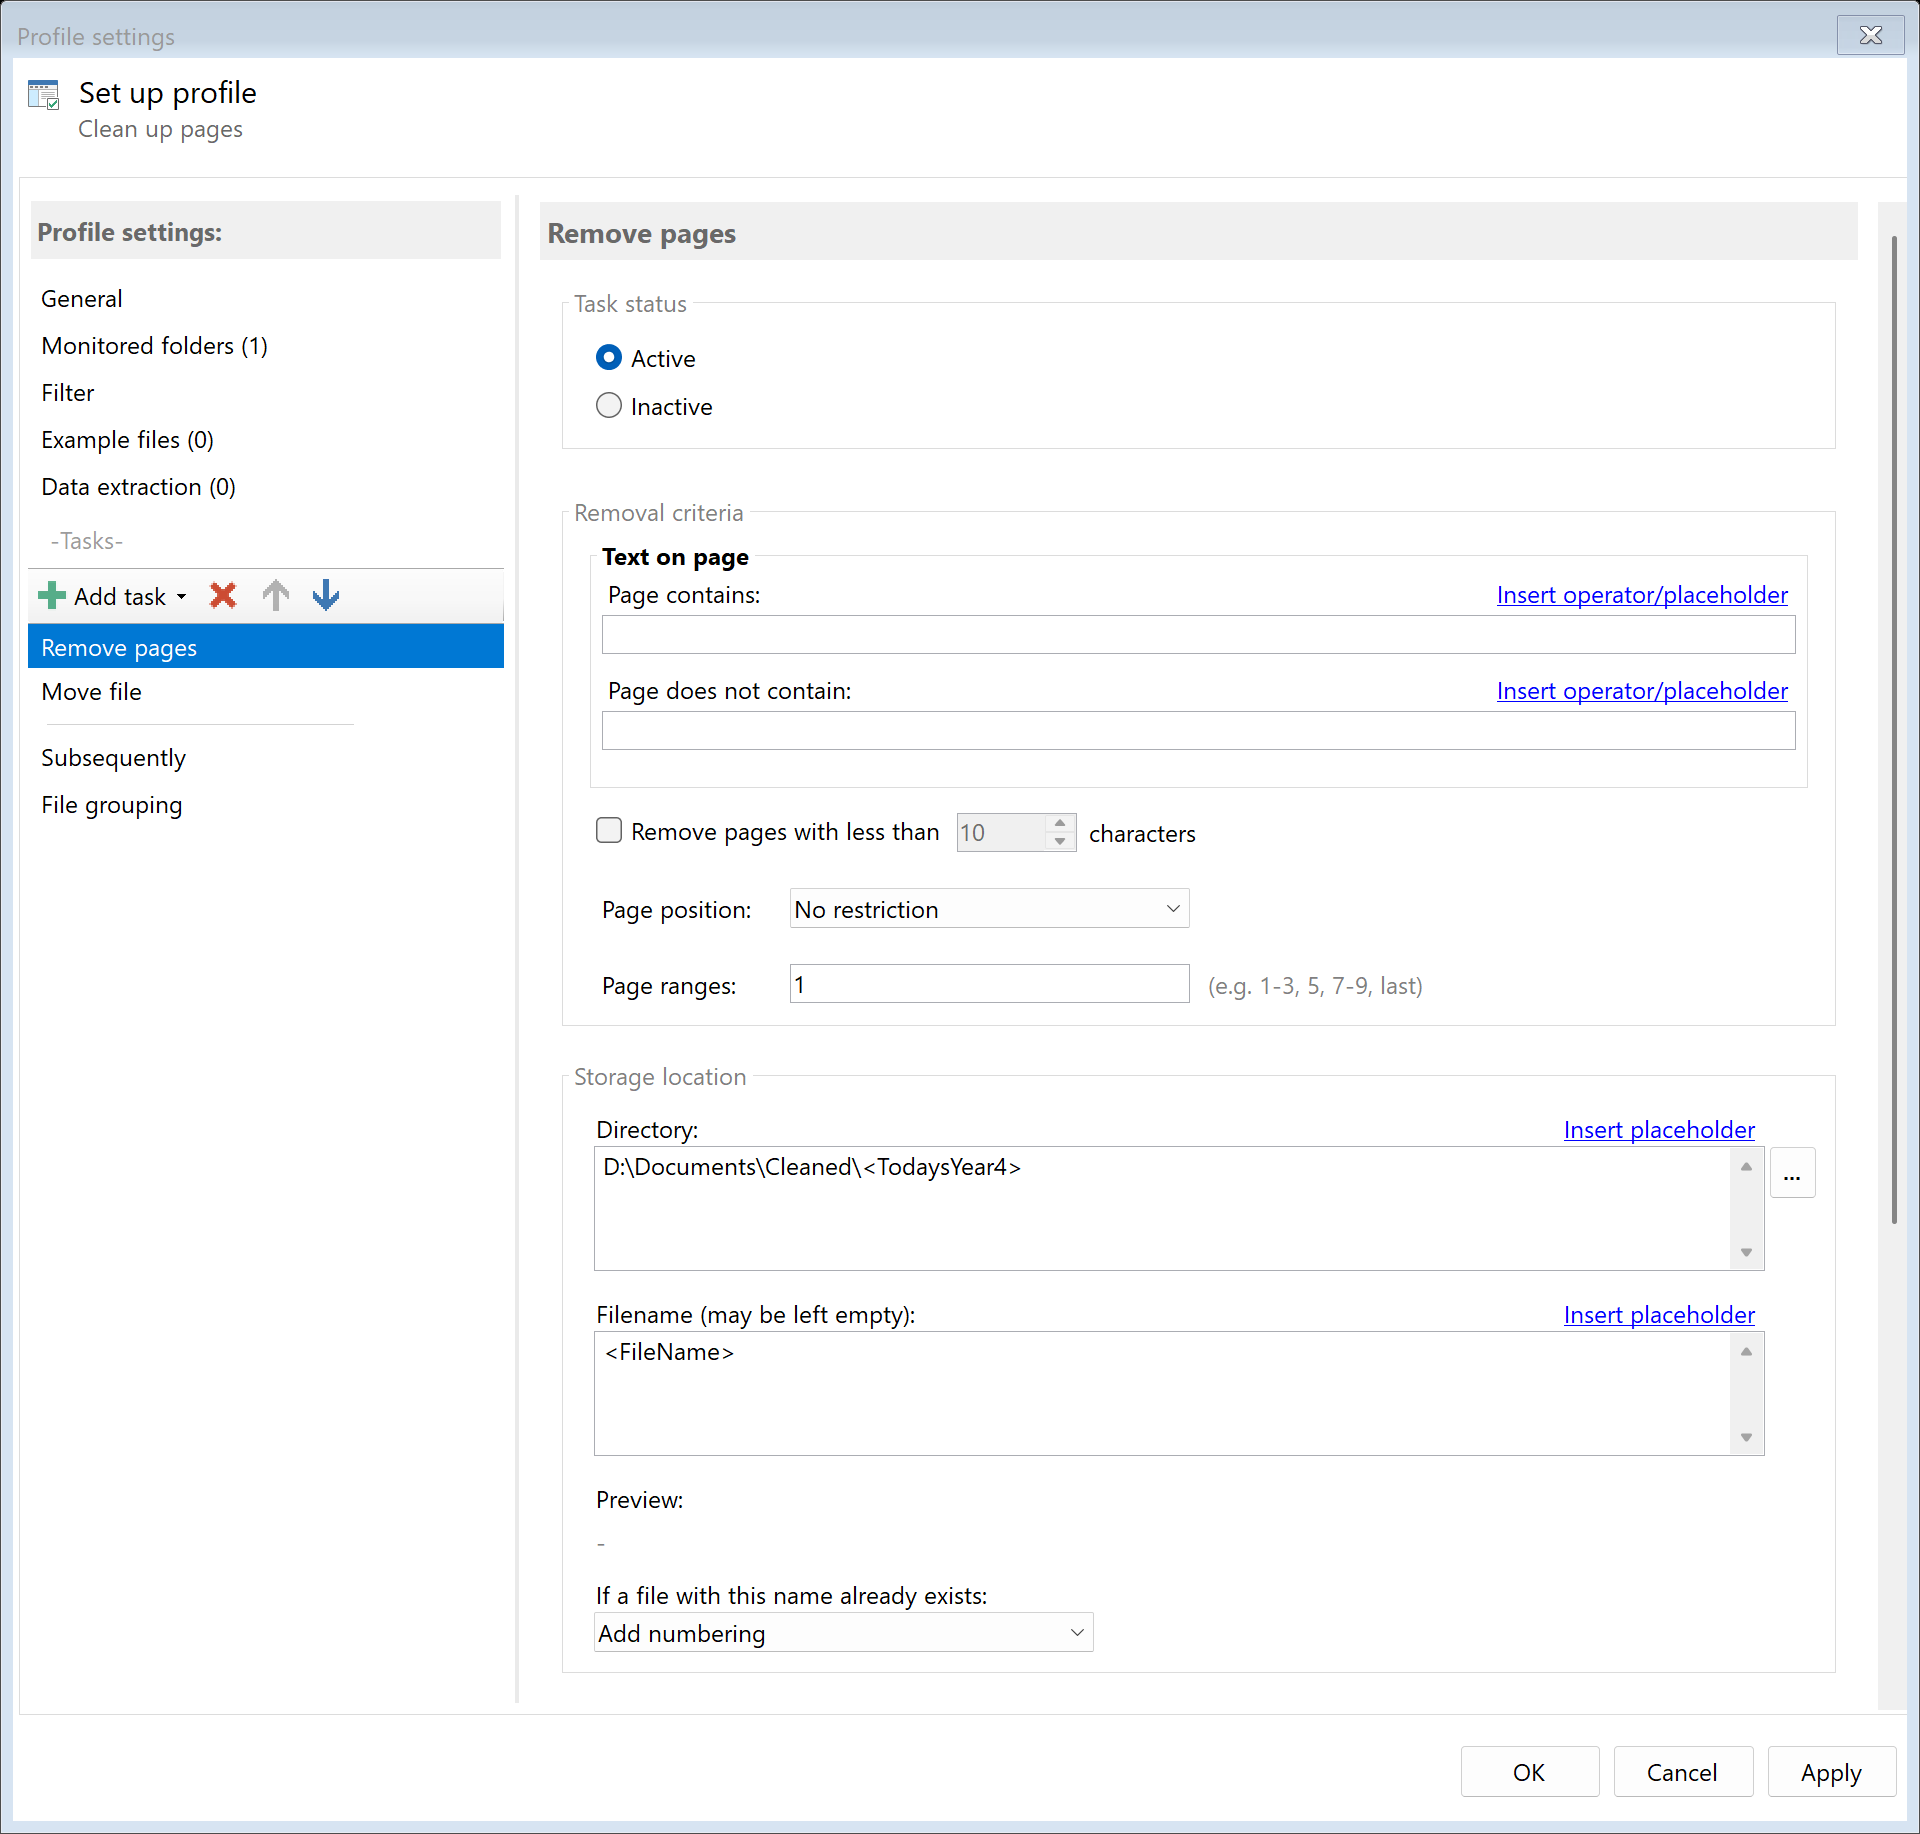
Step 3: Select removal method
Choose which pages should be removed:
| Criterion |
Description |
Example |
| Pages containing text |
Remove pages that contain specific text |
Pages with "This page is intentionally left blank" |
| Pages not containing text |
Remove pages that do NOT contain specific text |
Keep only pages with real content |
| Character count |
Remove pages with fewer than the specified number of characters |
Blank back sides of duplex scans |
| Page position |
Limit the check to even or odd pages |
Check only the back sides of a duplex scan |
| Page ranges |
Remove fixed pages by number |
"1-3, 5, last" |
| Barcode value |
Remove pages based on detected barcodes (switchable criterion) |
Separator sheets with a separator barcode |
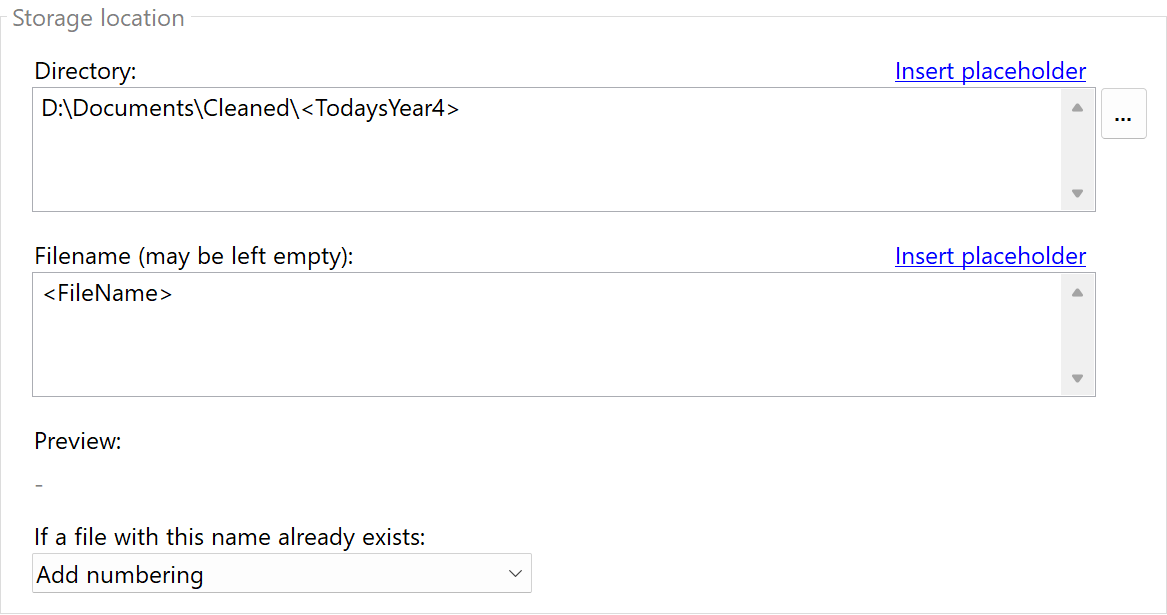
Step 4: Configure storage location
Specify where the cleaned documents should be saved:
D:\Documents\Cleaned\<FileName>
Result
After configuration, all PDF files placed in the monitored folder are automatically:
- Analyzed to identify pages to remove
- Specified pages removed from the document
- Saved as a cleaned PDF file