Step-by-step instructions for automated anonymization of PDF documents
GDPR (General Data Protection Regulation) often requires anonymization of personal data
before documents can be shared. With Automatic PDF Processor, you can fully automate
this process.
Video tutorial: Automatically anonymize PDF documents (with narration and optional subtitles)
Typical use cases
- Anonymization of customer data for training purposes
- Removal of names and addresses from contracts
- Redaction of account numbers and IBAN
- Replacement of employee numbers with pseudonyms
- Anonymization of medical records
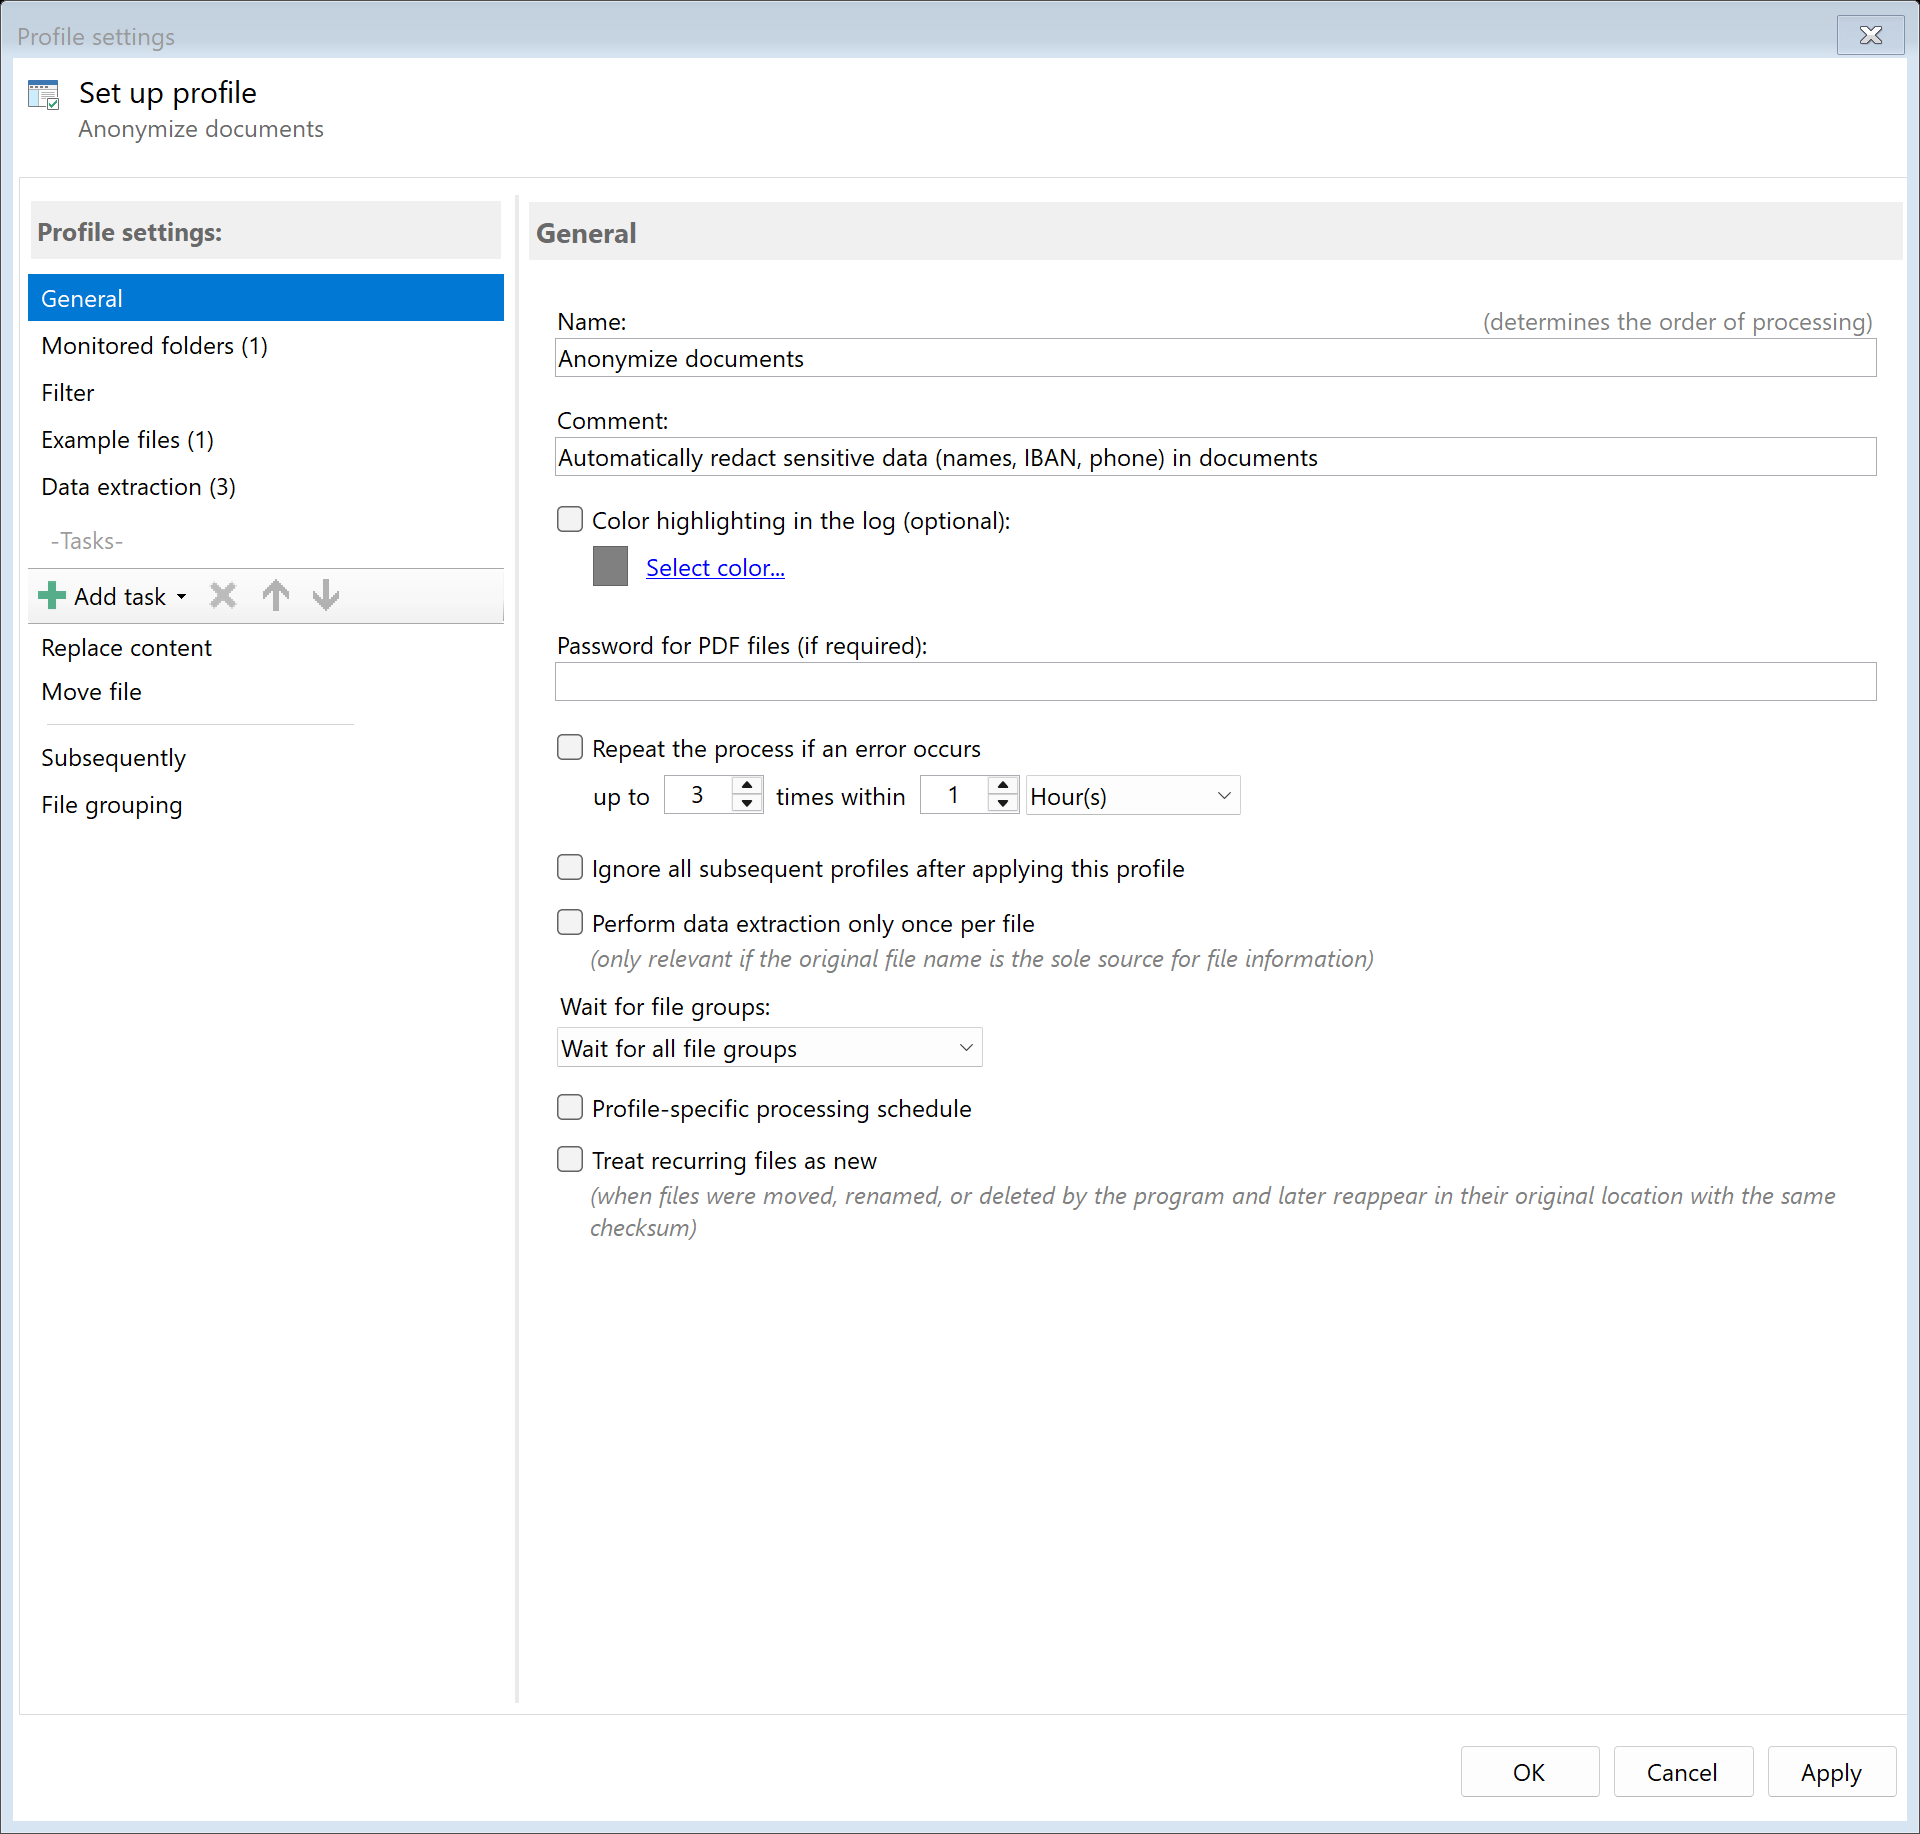
Step 1: Create a new profile
Create a new profile with a descriptive name such as "Anonymize documents".
Set up the monitored folder where documents to be anonymized will be placed.
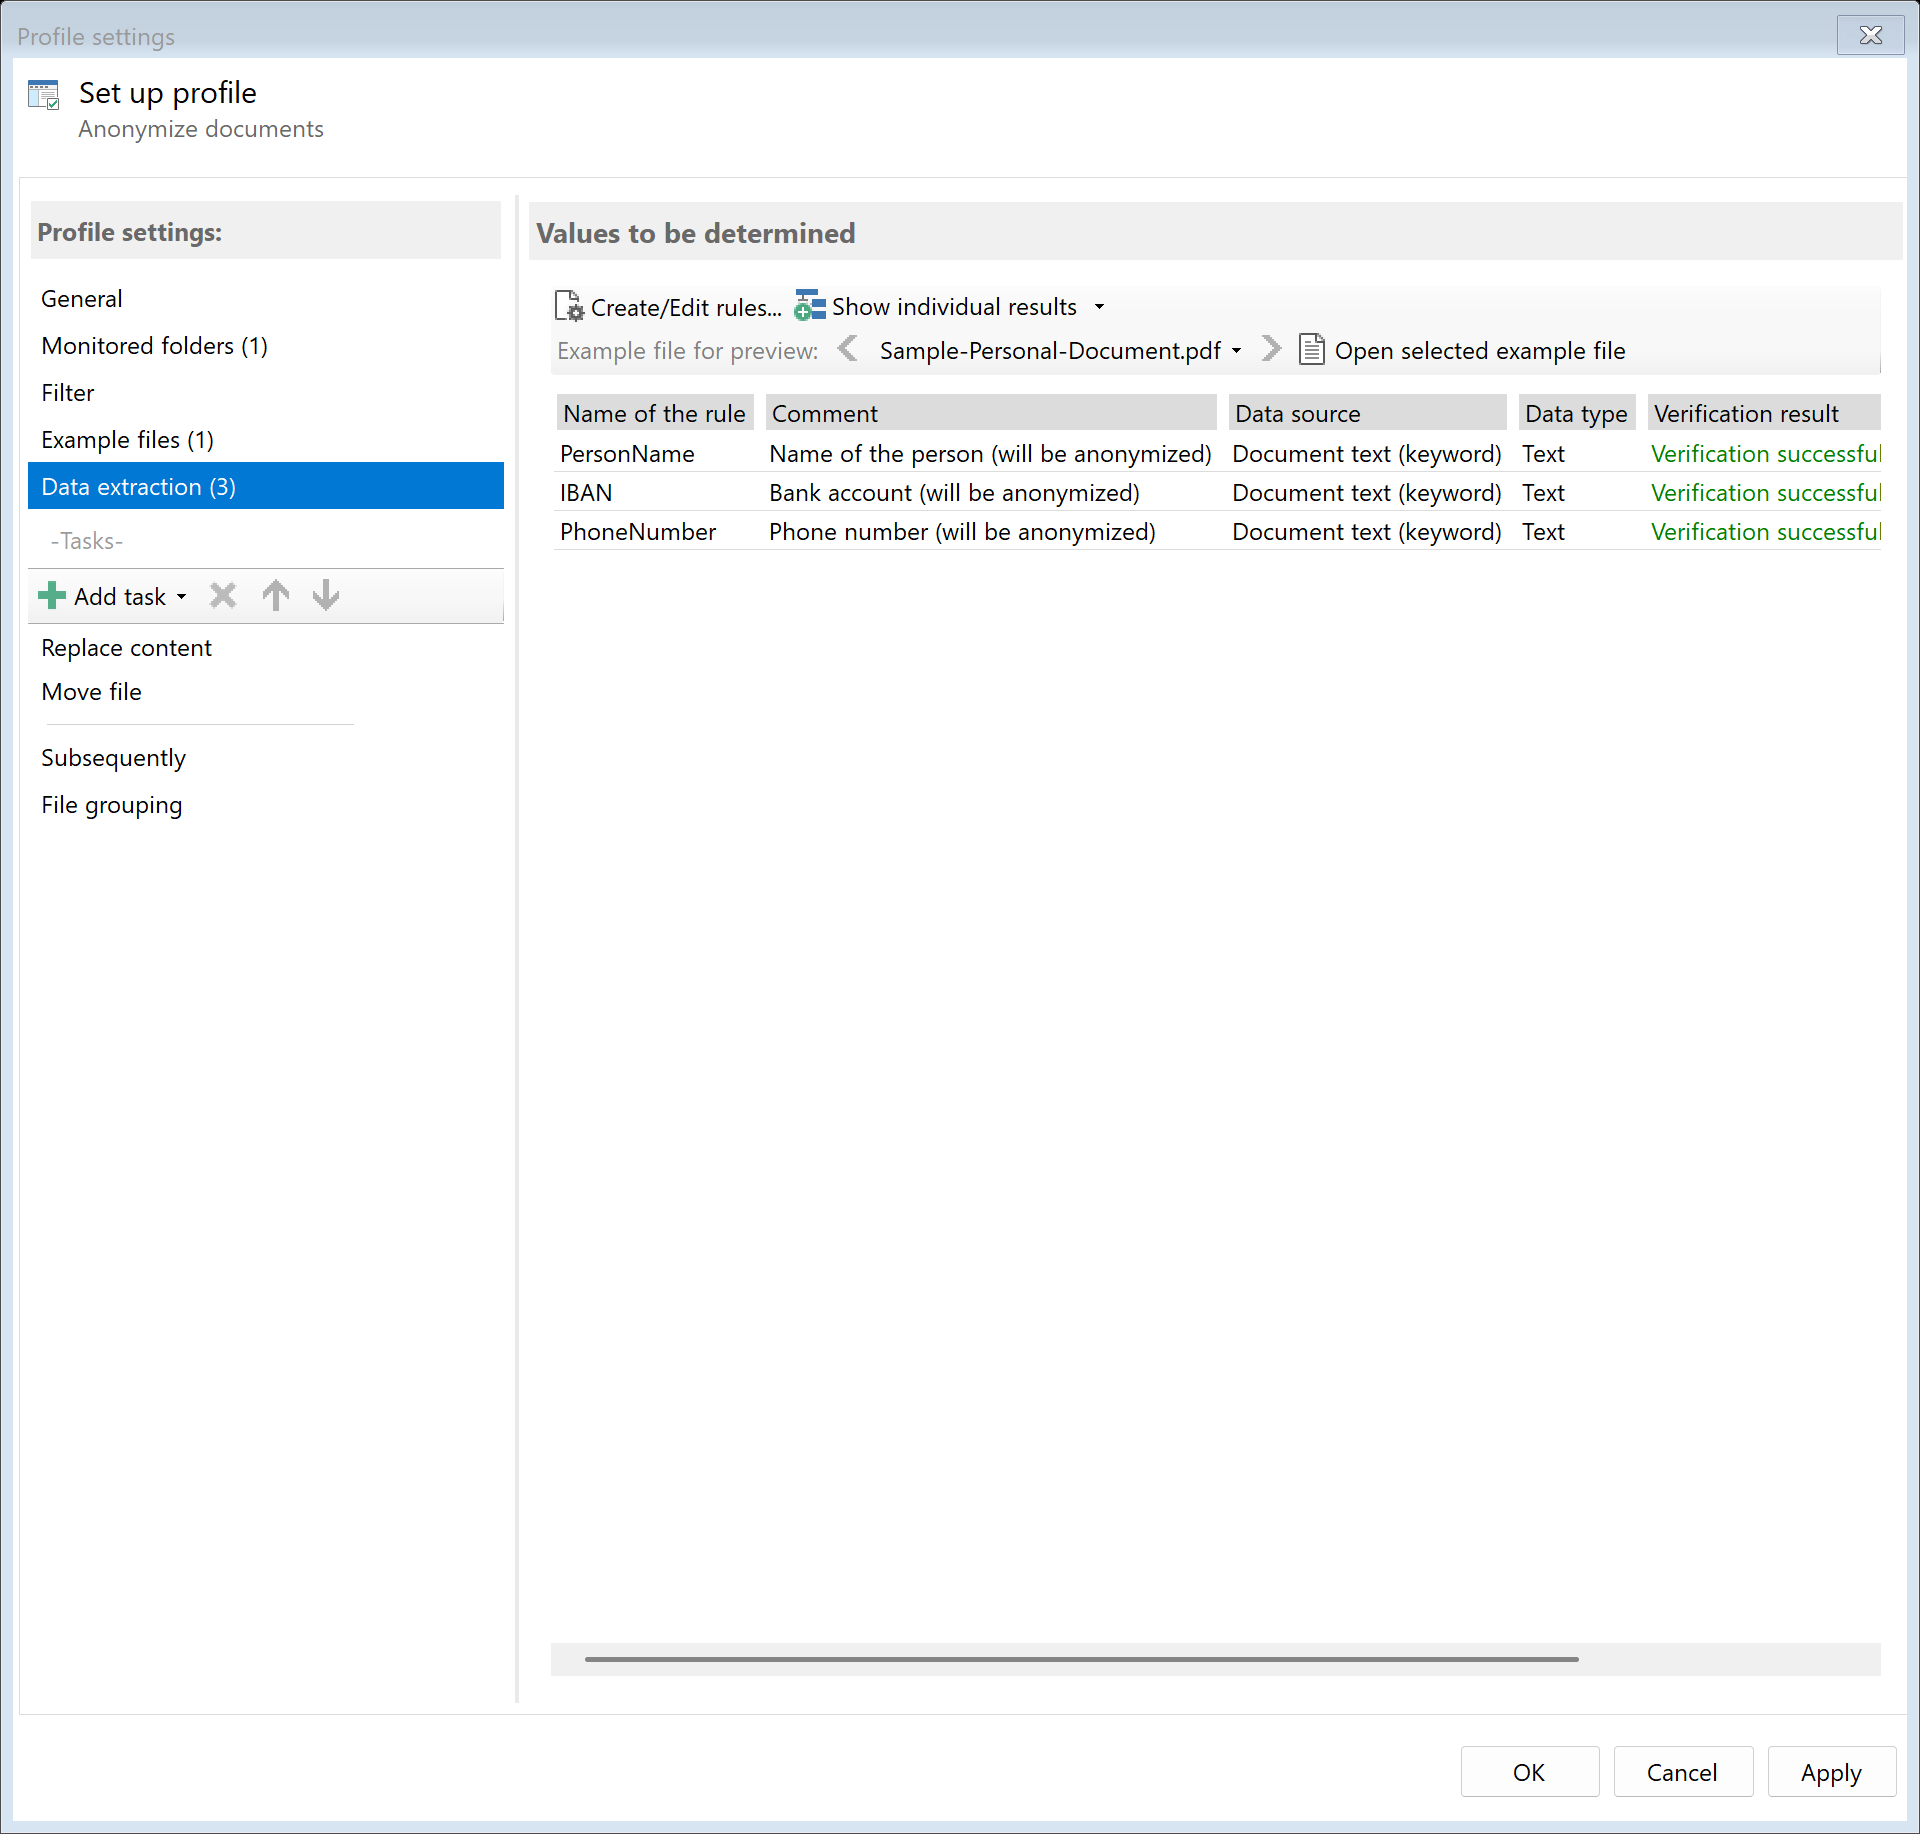
Step 2: Create extraction rules for data to be anonymized
To anonymize data, you first need to define which areas in the document contain
the data to be replaced. Go to the "Data Extraction" tab and create rules for
each area to be anonymized:
- Name: Define an area containing the name
- Address: Define an area for the address
- IBAN: Define an area for the account number
The position can be determined via a keyword (e.g., "Name:") or absolute coordinates.
When extracting data using a keyword, it is often better to set the data position to
"Area of the found location" and use "Extend data area" to shift and enlarge it, so that
for example the text to the right is fully captured. This often results in more accurate positioning.
Step 3: Activate the "Replace Content" task
Go to the task view and select the "Replace Content" task. This task allows you
to replace the text defined in the extraction rules with another value
(redaction with text replacement).
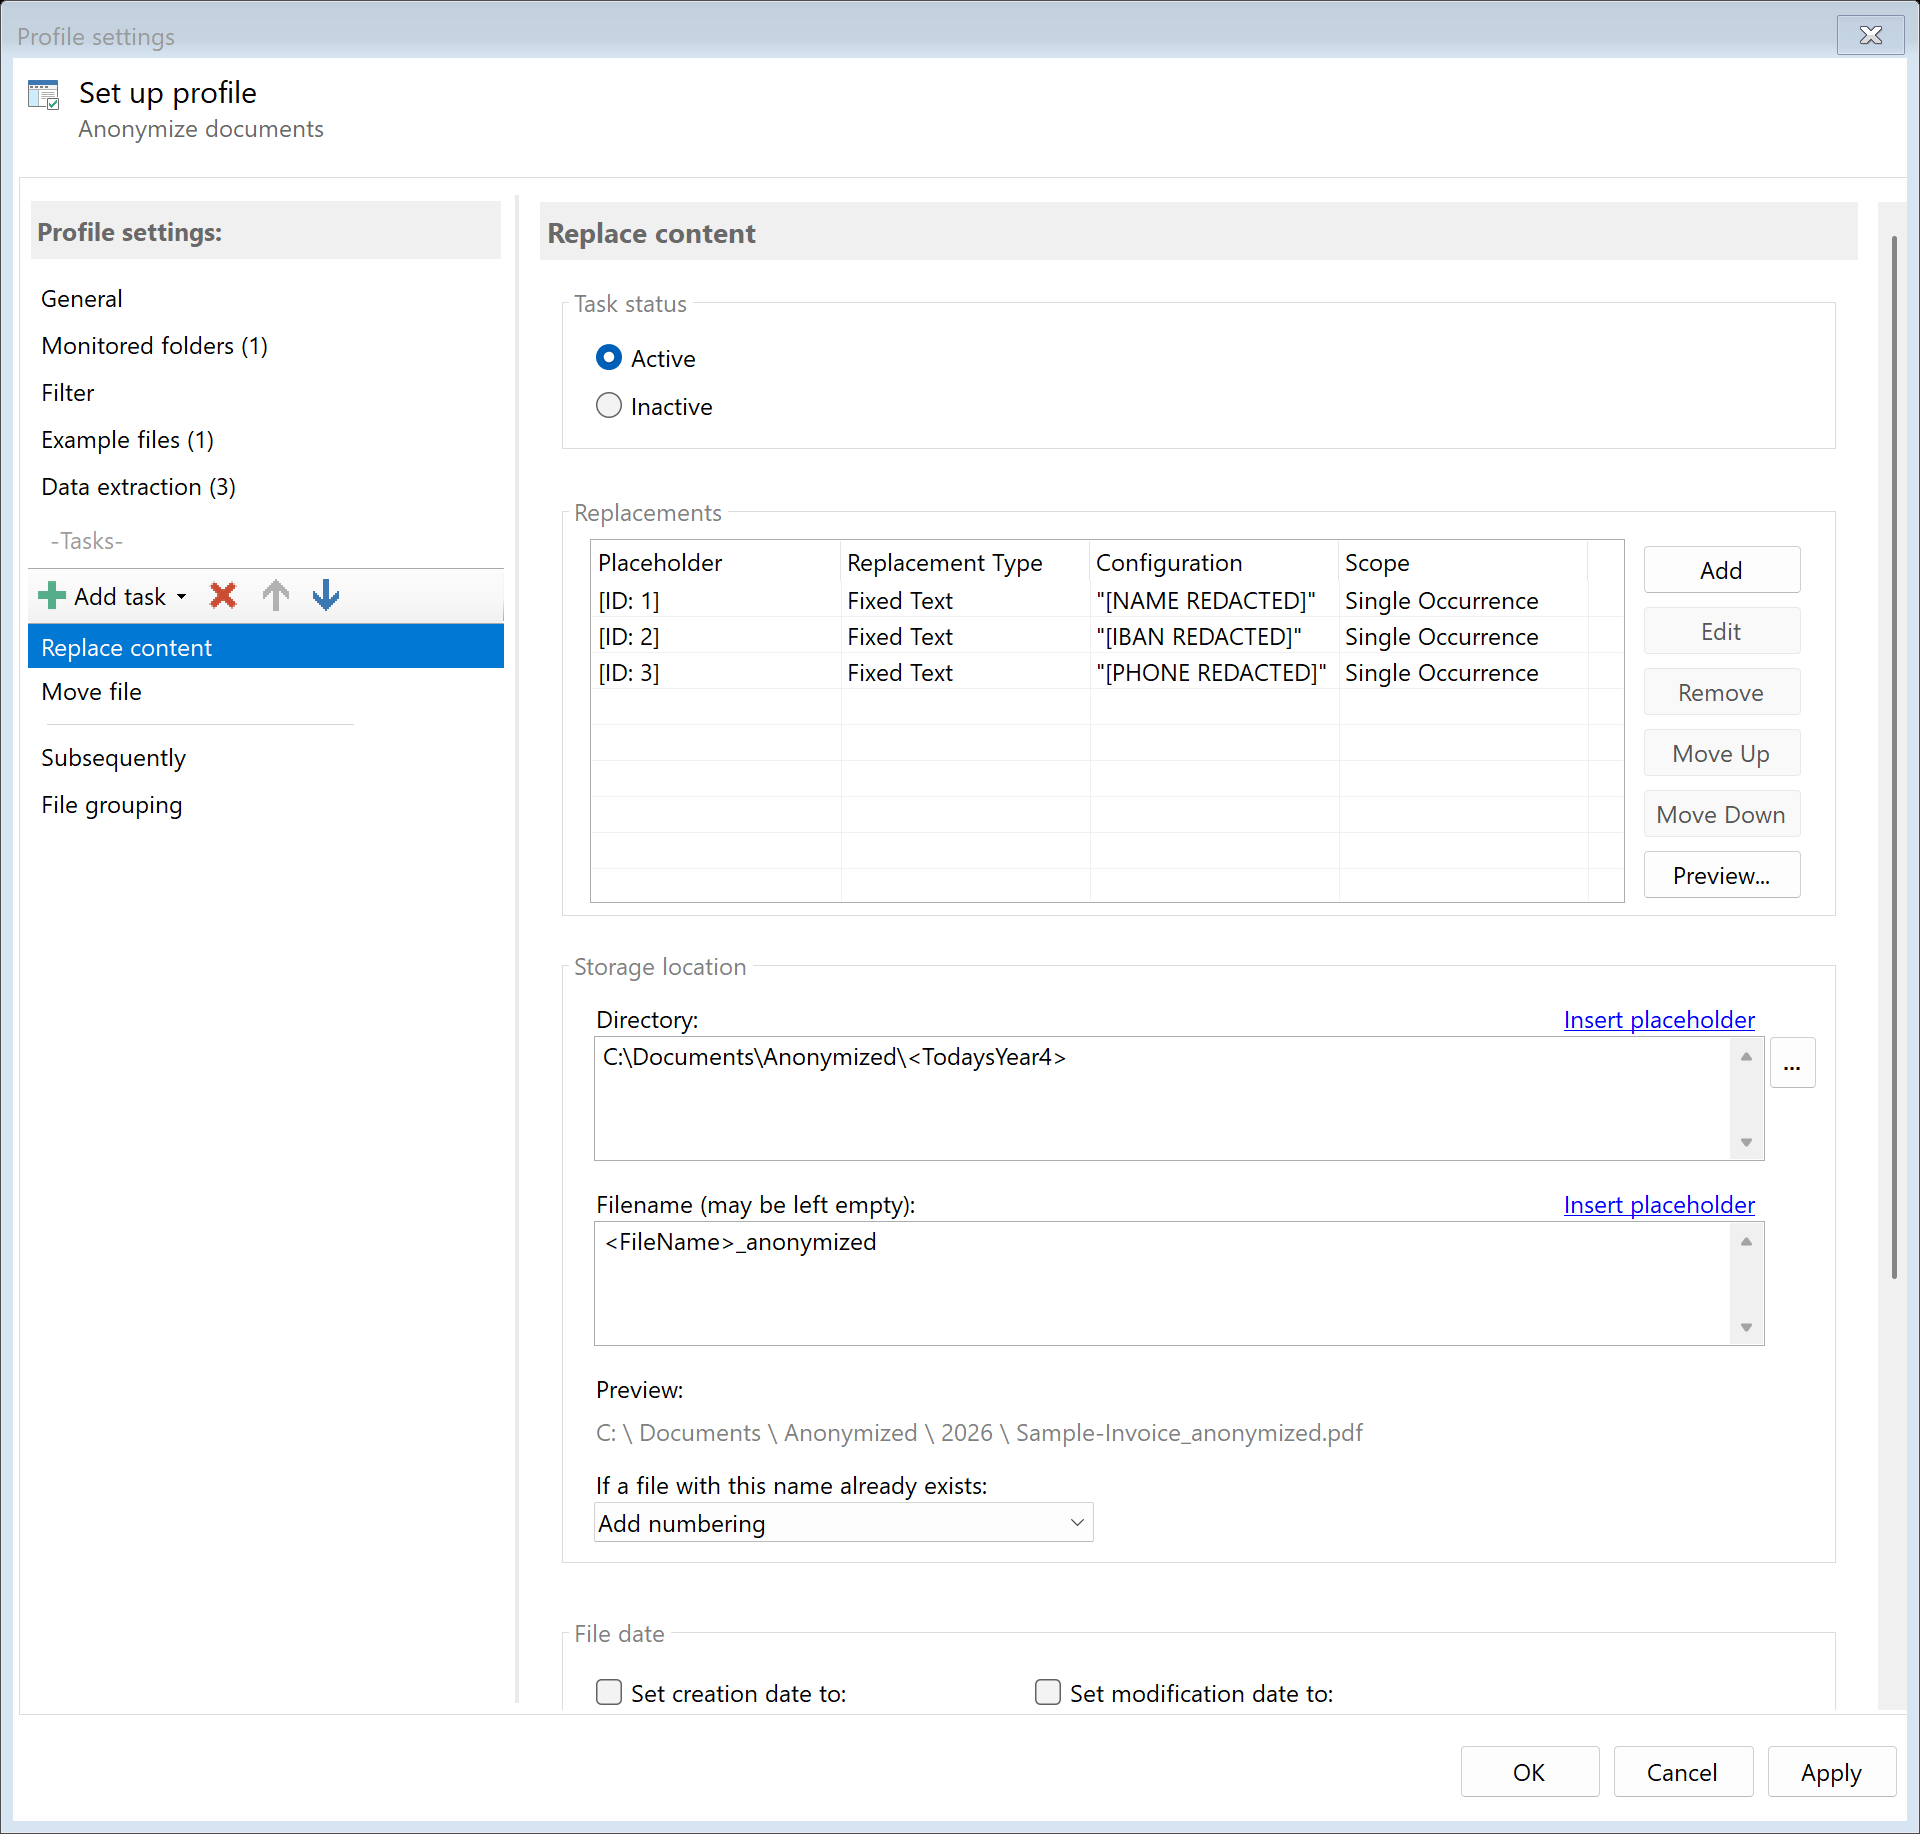
Step 4: Configure replacement rules
For each extraction rule, you can specify what value the found text should be
replaced with. The following replacement sources are available:
| Source |
Description |
Example |
| Fixed text |
Always the same replacement text |
"[ANONYMIZED]" or "XXXXX" |
| Random number |
Random number with configurable digits |
"98234567" |
| Sequential |
Sequential number |
"PERSON-00001", "PERSON-00002" |
| Random from list |
Random value from a text file |
Random name from name list |
| CSV mapping |
Value from CSV file based on key |
Pseudonym based on original ID |
| Date/Time |
Current date or time |
"2024-01-01" |
Step 5: Set application scope
For each replacement rule, you can set the application scope:
- Single occurrence: Replace only the occurrence found by the rule
- All pages at same position: Same position on all pages (e.g., headers/footers)
- All occurrences in document: Replace every match in the entire document
Example: Replace names with pseudonyms
To consistently replace names with pseudonyms, you can use CSV mapping:
- Create a CSV file with the mapping Original → Pseudonym
- Set up a DynamicQueryList in the program options
- Select "CSV mapping" as the replacement source
- Select the appropriate list
This way, "John Smith" is always replaced with "Person A", while "Jane Doe"
is always replaced with "Person B".
Step 6: Set destination
Specify where the anonymized documents should be saved. It is recommended
to use a separate folder for the anonymized versions:
D:\Documents\Anonymized\<TodaysYear4>\<TodaysMonth>
Result
After configuration, all documents placed in the monitored folder are automatically:
- Analyzed to find the defined data areas
- Personal data replaced with the configured replacement values
- Saved as an anonymized version in the destination folder
The replacement is irreversible - the original data cannot be reconstructed
from the anonymized version.