Learn the basics of Automatic PDF Processor
At a Glance
- Difficulty: Beginner
- Time required: ~5 minutes
- Prerequisites: None - this is the perfect starting point
- What you'll learn: Create your first profile and understand the main window
What is Automatic PDF Processor?
Automatic PDF Processor monitors folders on your computer for new PDF files and processes them
automatically according to your rules. You can rename, move, print, email, split, merge, and much more -
all without manual intervention.
The key concept is the profile: A profile defines which folders to watch,
which PDF files to process (using filters), and what to do with them (tasks).
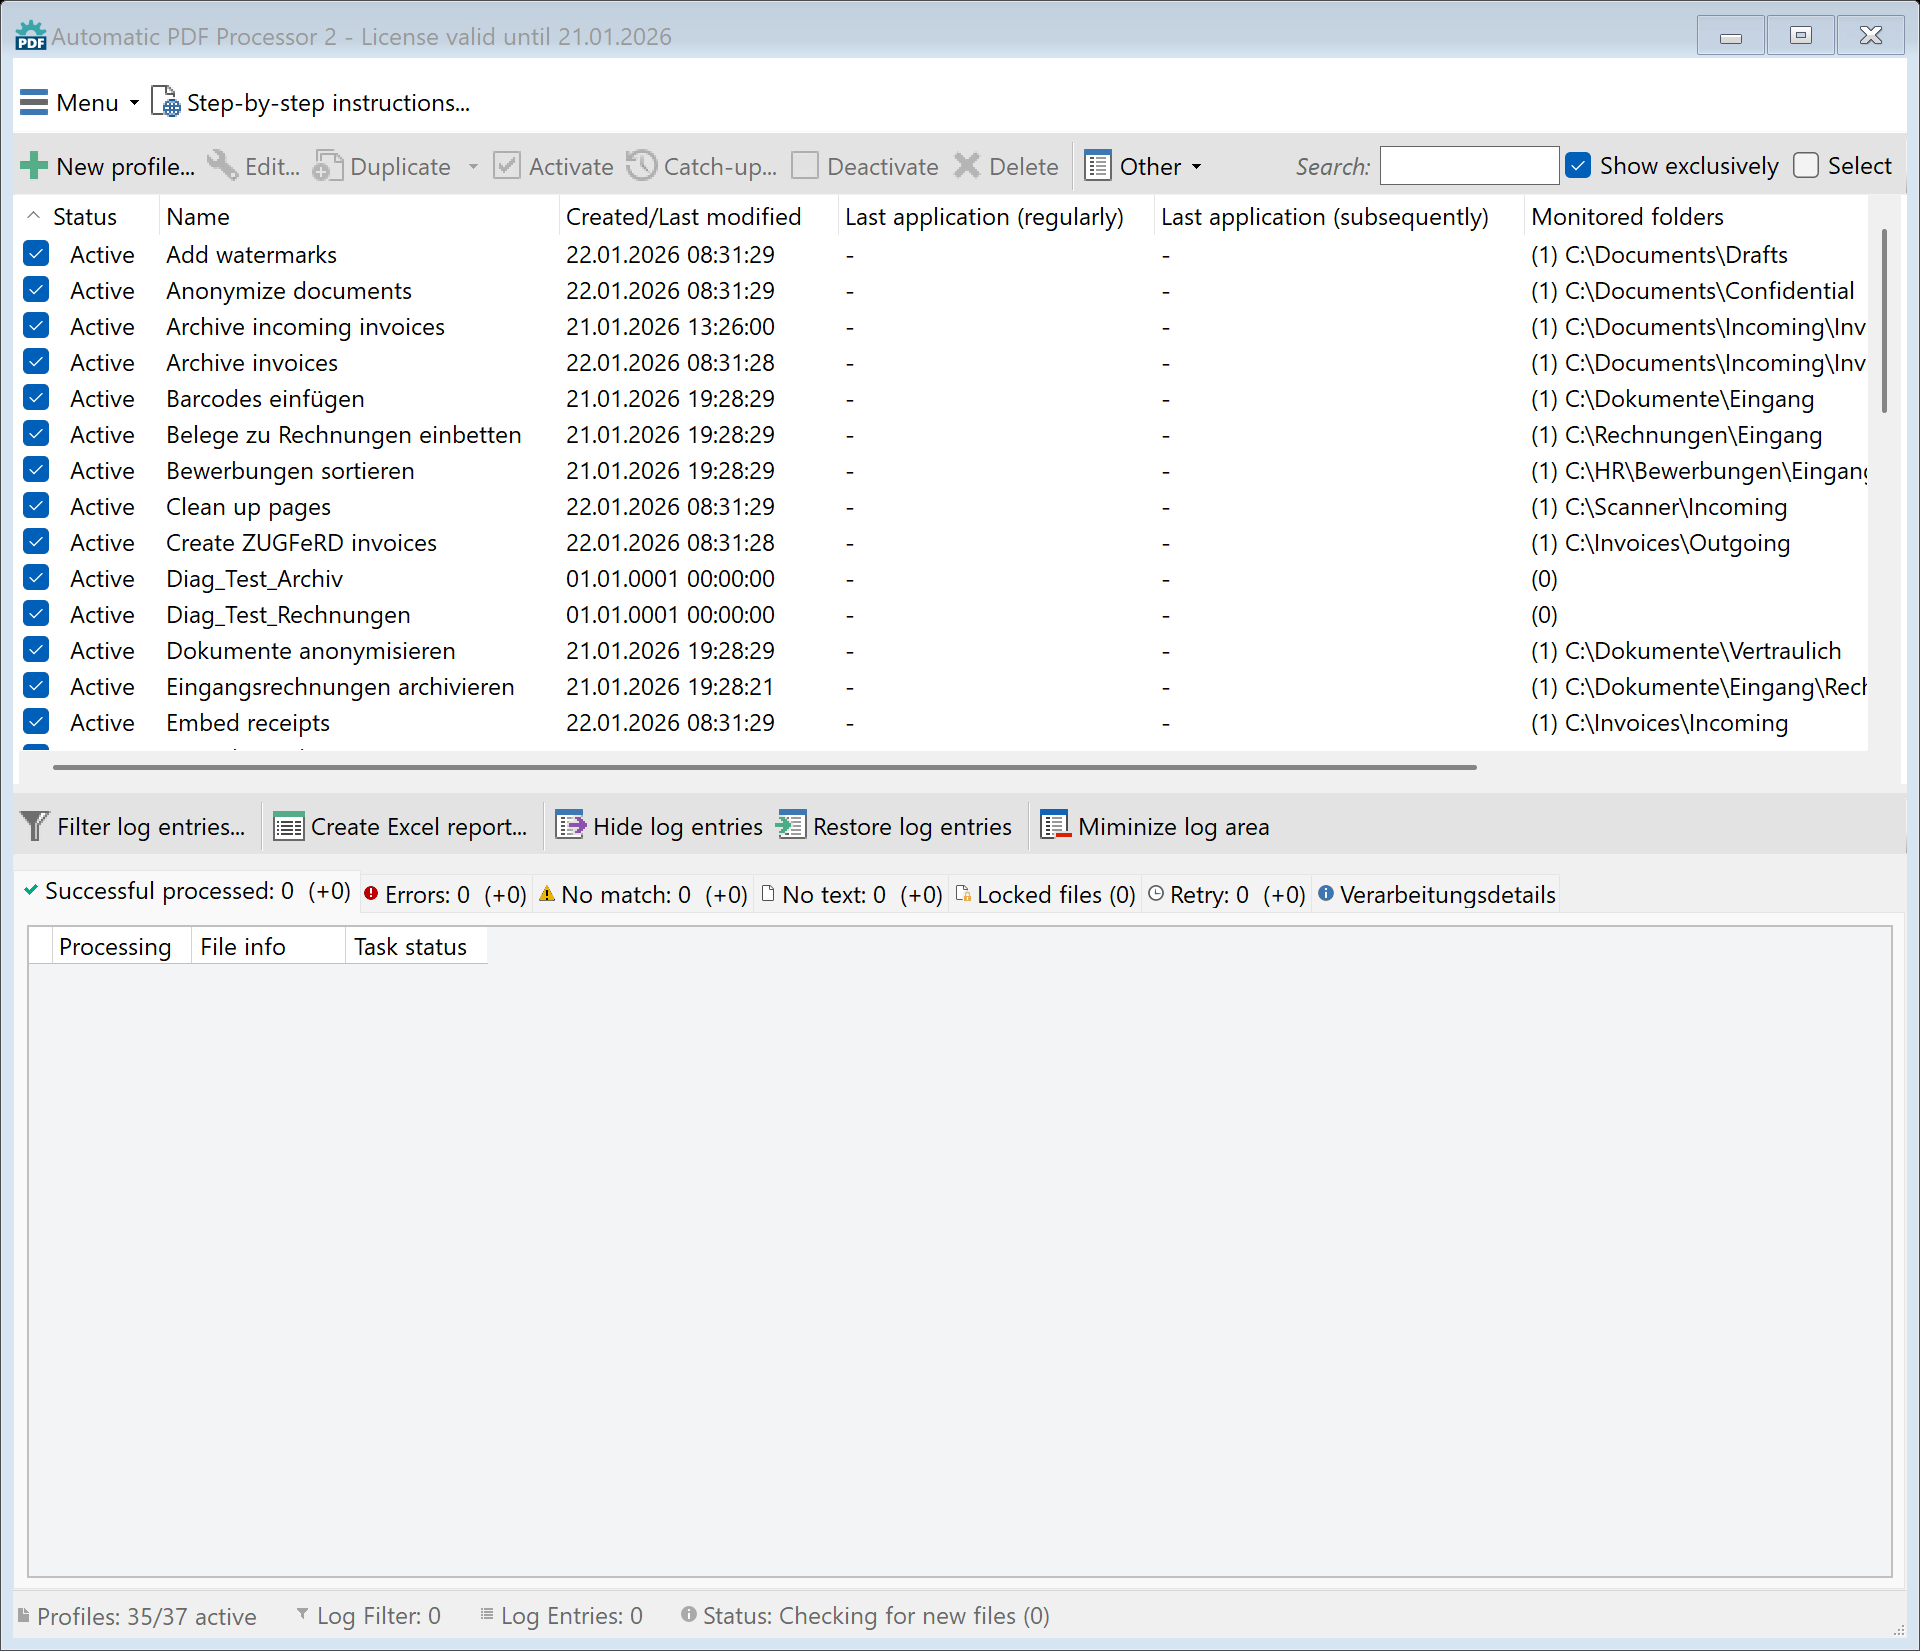
Step 1: Understand the main window
When you start Automatic PDF Processor, you'll see the main window with three important areas:
- Toolbar (top): Buttons for creating profiles, starting/stopping monitoring, and accessing settings
- Profile list (left): All your profiles are listed here - you can activate, edit, or delete them
- Log area (right): Shows all processed files with their status (success, error, no match)
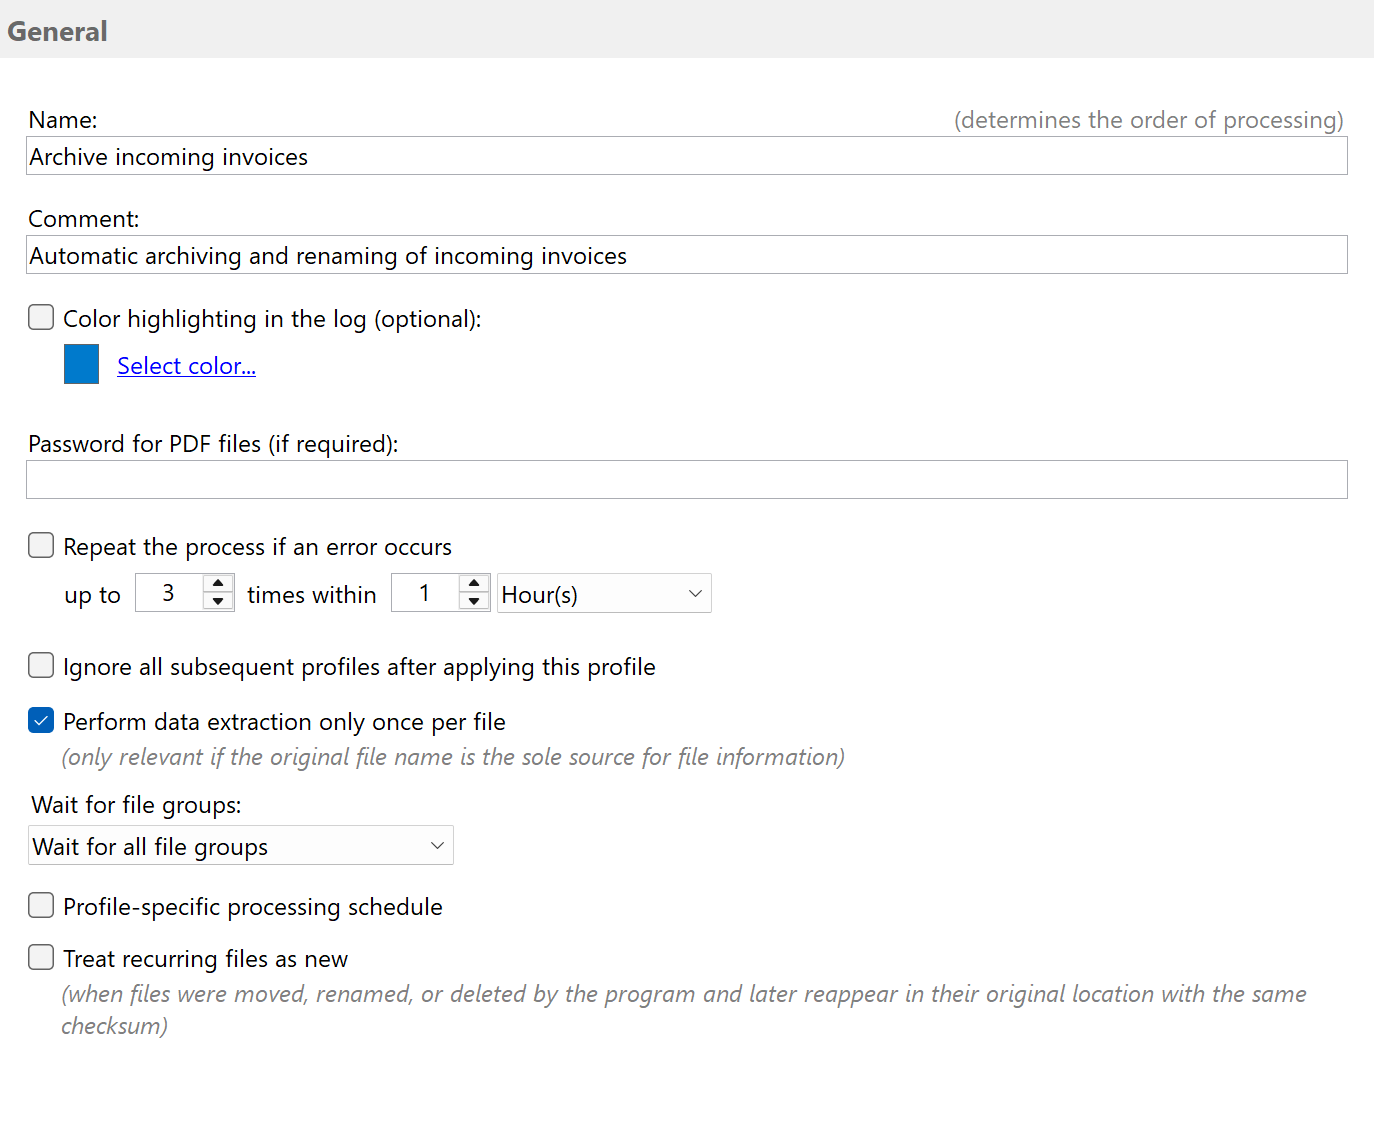
Step 2: Create your first profile
Click the "New profile..." button in the toolbar. The profile editor opens where you
configure all settings.
Enter a meaningful name for your profile, for example "Move invoices to archive".
This name helps you identify the profile later in the list.
Step 3: Select a folder to monitor
Click on "Monitored folders" in the left navigation. Then click "Add..."
to select a folder where your PDF files arrive.
For example, select your Downloads folder or a folder where you receive invoices.
You can add multiple folders if needed.
Tip: Enable "Include sub-folders" if you want to process PDFs from all sub-folders too.

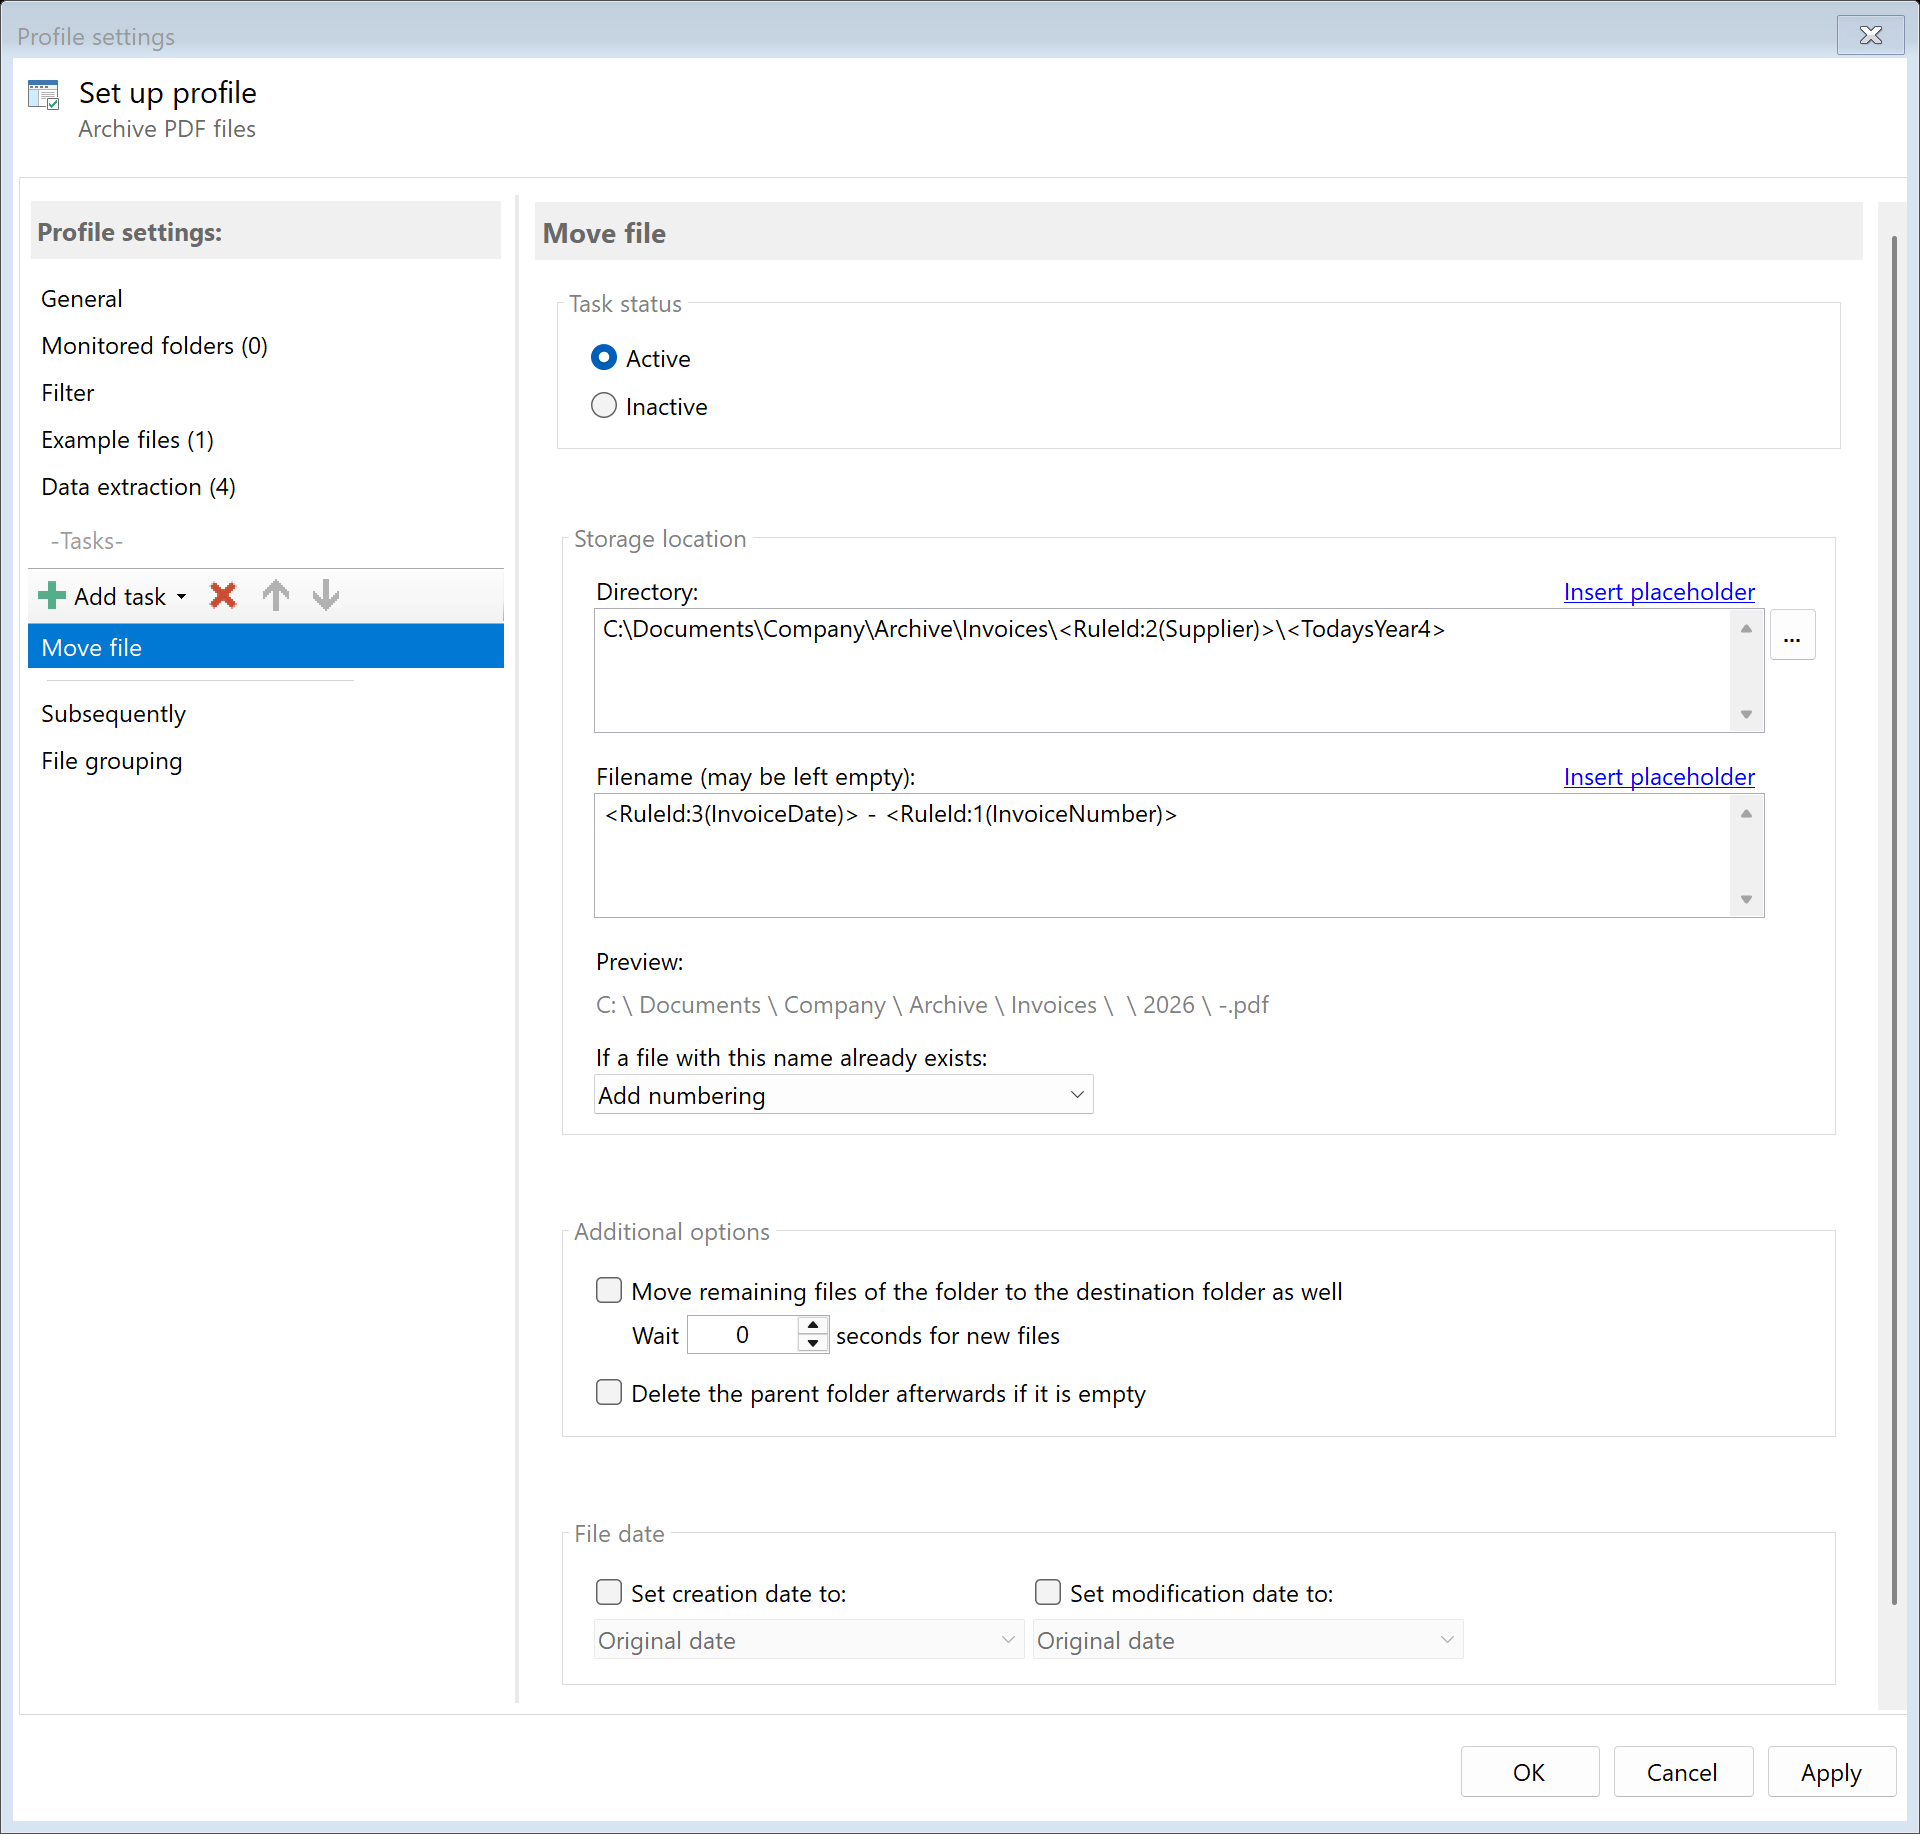
Step 4: Add a task (what should happen?)
Now define what should happen with the PDF files. Click "+ Add task" and select a task type.
For your first profile, we recommend a simple task like "Move file":
- Click "+ Add task" and select "Move file"
- Set the task status to "Active"
- Select a destination folder (e.g., C:\Archive\Invoices)
- Leave the filename empty to keep the original name
Step 5: Save and test
Click "OK" to save your profile. The profile now appears in the profile list
on the left side of the main window.
Test your profile:
- Make sure the profile is activated (checkbox is checked in the profile list)
- Copy a PDF file into your monitored folder
- Watch the log area - within seconds, the file should be processed
- Check your destination folder - the PDF should now be there
Congratulations! You've created your first automated PDF workflow.
Result
After completing this tutorial, you now understand:
- The main window with profile list, toolbar, and log area
- How to create a new profile
- How to select folders to monitor
- How to add a task that processes the PDF files
- How to test your configuration
Your profile will now automatically process any new PDF files placed in the monitored folder -
24/7, without any manual intervention.
Next steps
Now that you've created your first profile, you can explore more features:
- Add filters: Process only PDFs that contain certain text or have specific file names
- Use data extraction: Read invoice numbers, dates, or names from PDFs and use them in file names
- Add multiple tasks: Rename AND move files, or print AND archive them
- Set up notifications: Get an email when files are processed or errors occur
Check out our other tutorials below to learn about these advanced features.