Step-by-step instructions for automatically moving PDF files with Automatic PDF Processor for Windows
At a Glance
- Difficulty: Intermediate (requires data extraction)
- Time required: ~15 minutes
- Prerequisites: Getting Started tutorial
- Tasks used: Move file
Video tutorial: Automatically move PDF files (with narration and optional subtitles)
Introduction
This tutorial shows how to set up a hot folder to auto-move PDF files using data extracted from their contents. After
creating the profile, you can also move a batch of pre-existing PDF files using the Catch-up function from the upper toolbar.
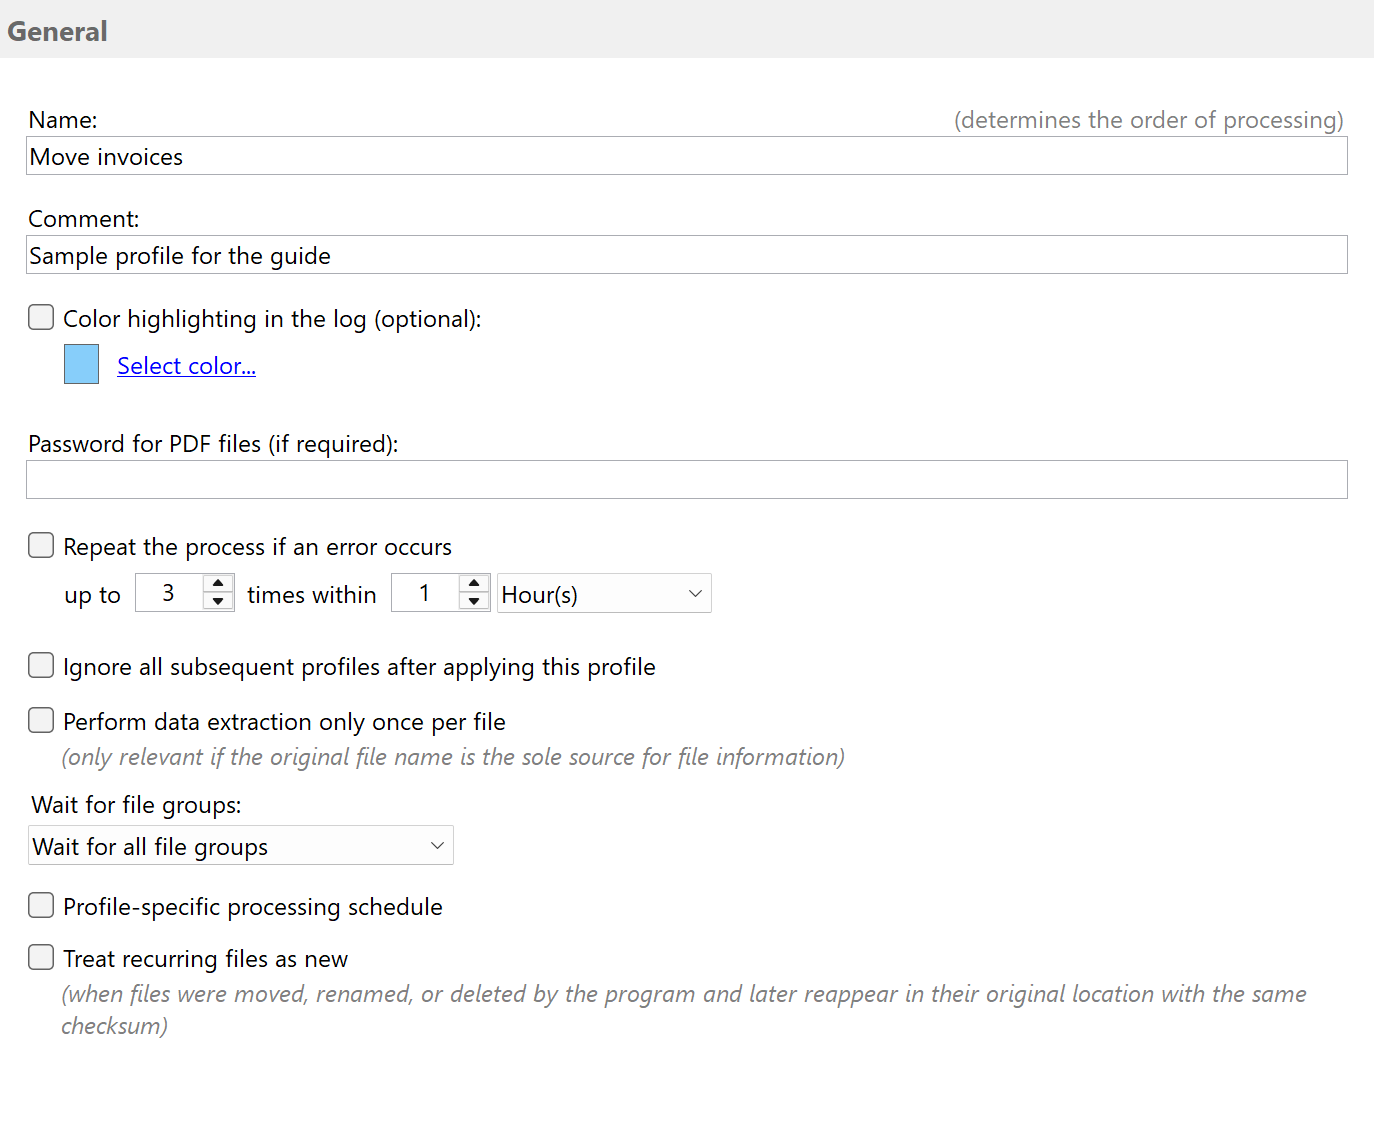
Create a new profile
To create a new profile, click the New Profile button in the upper toolbar. In the configuration window that
opens, you can give the profile a meaningful name (for example, Move invoices) and optionally add a comment, e.g., the destination
folder. The program will show this comment in the profile list. If necessary, you can enter the password for the PDF files in
the input field below.
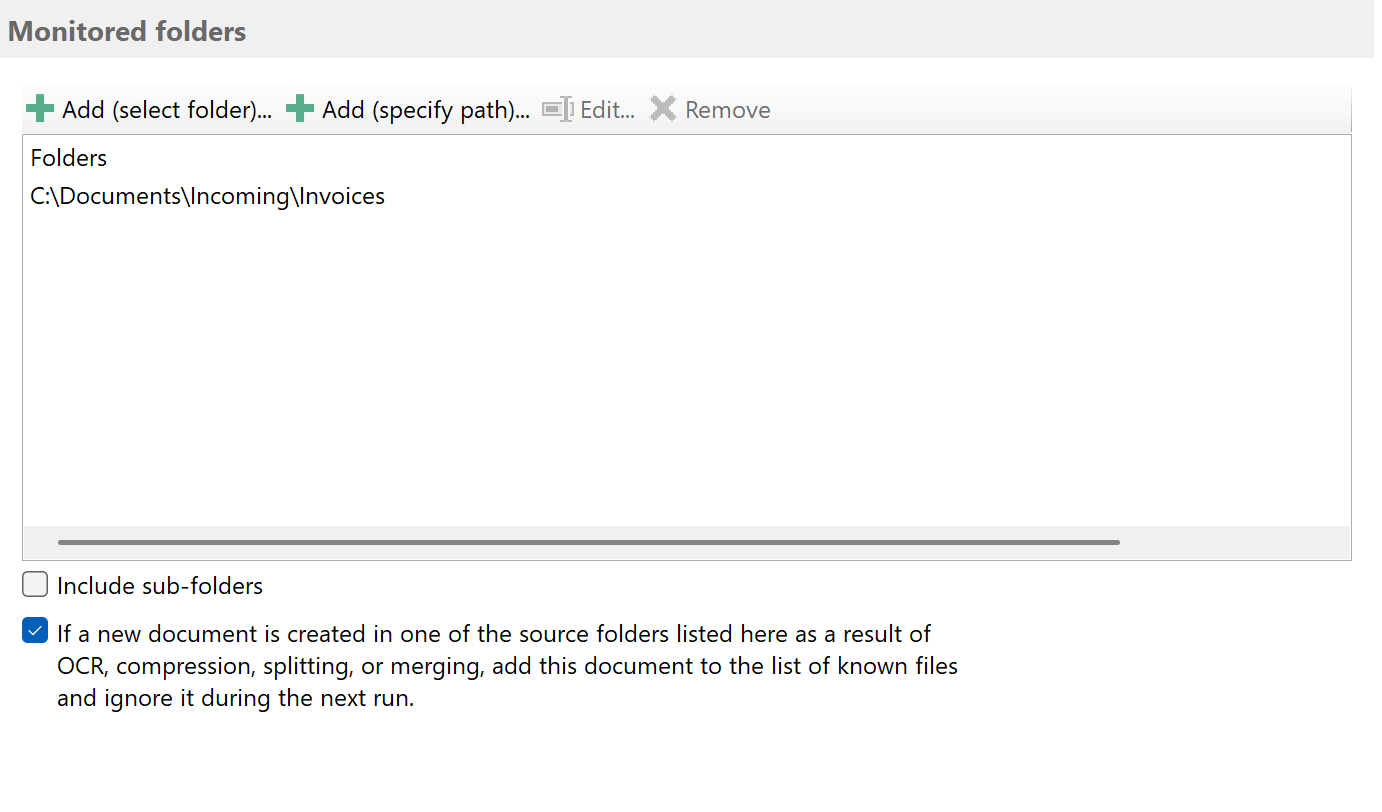
Determine the folder to be monitored
Select a folder to be monitored, i.e., one or more folders where the PDF files to move will arrive. To do so, click the Add button
and select one of the folders listed there.
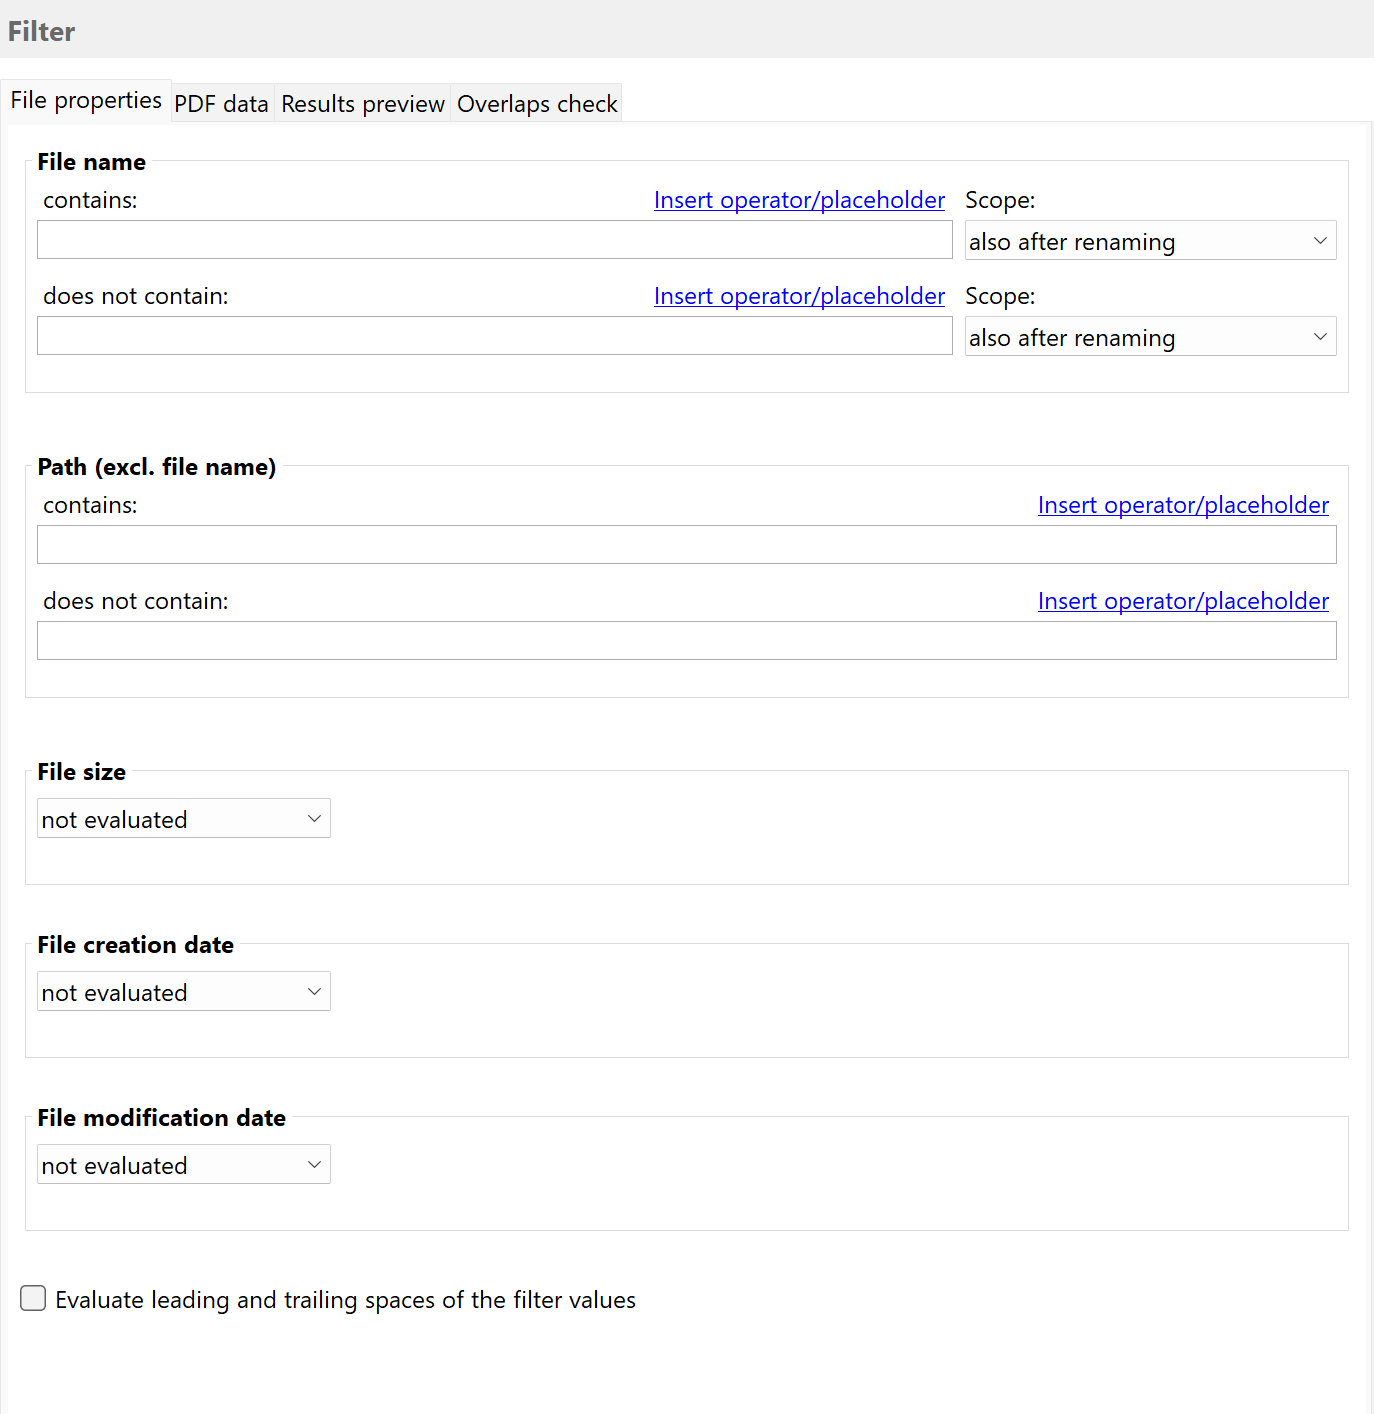
Set filters
To move only specific PDF files automatically, you can optionally define filter criteria here. For example, enter a term from the
text of the document and part of the file name. You can also use a list containing all your customer names or numbers, for
example. Filter terms can be combined with logical AND and OR. The Results Preview tab shows whether the sample
files added (in the next step) meet the filter criteria.
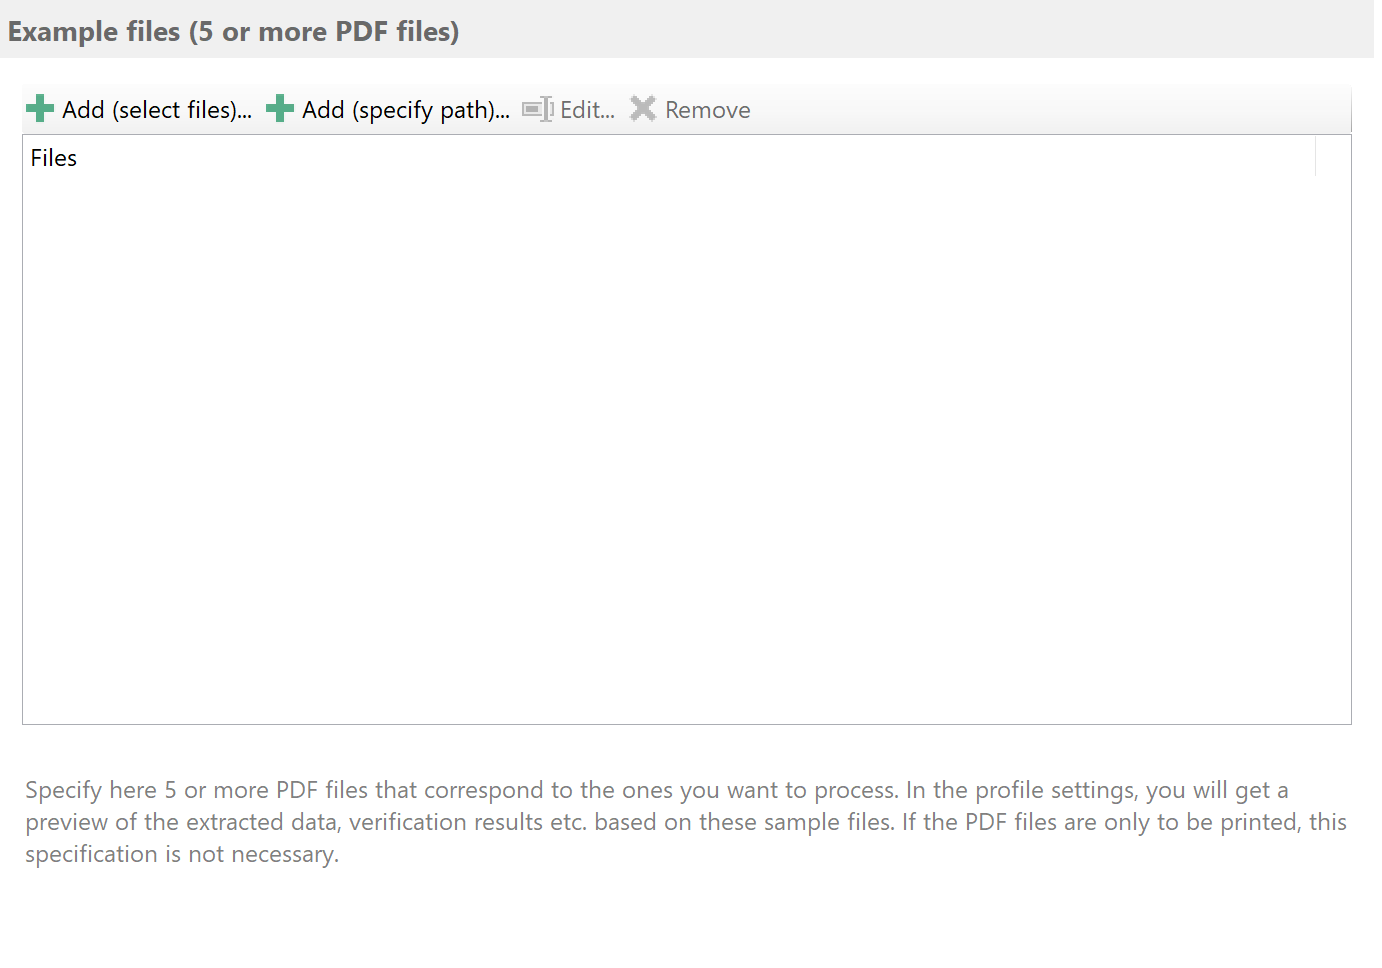
Add example files
Specify five or more PDF files here which correspond to the files you want to process. You will get a preview of the extracted
data, verification results, etc., based on these sample files in the profile settings. If you only want to print the PDF files,
this step is not required. However, since the preview of the filter results is based on the sample files, adding the sample files is recommended. It is best to select files located in a separate directory to ensure they will not be processed,
especially not renamed or moved.
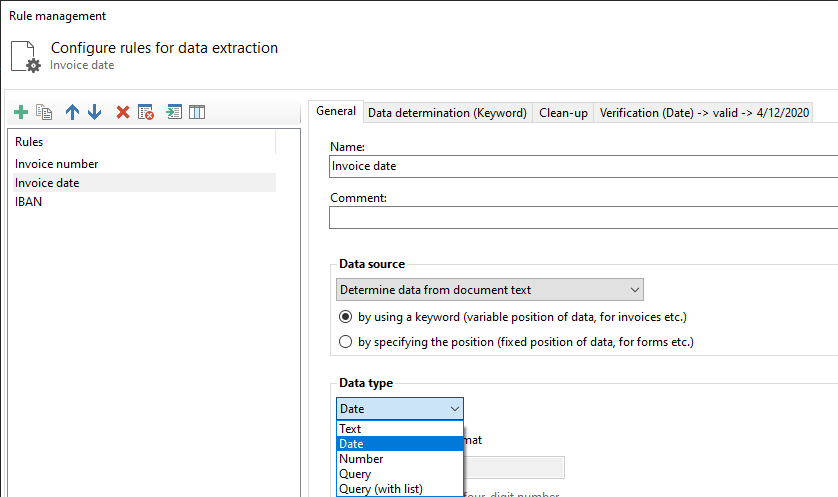
Extract data
Switch to the Data Extraction category and click Create/Edit Rules... to open the rule editor. Once you have some rules created,
you can alternatively double-click on a rule name to navigate directly to it.
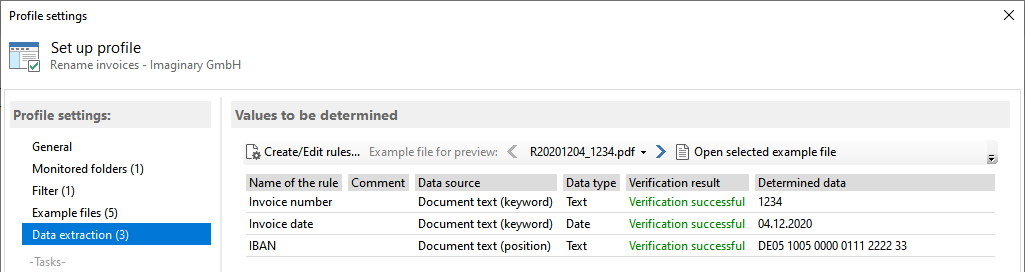
In the Rule Management window, you can set up rules to extract values from the text of the respective PDF file using the
previously defined sample files. For most cases, the data type Text is the right choice. However, when extracting a date,
you should choose the data type of the same name. This way, when you use the extracted value, you have the individual date
components available and can combine them as you wish.
With the data type Query or Query With List, you can store a value in a placeholder depending on the occurrence of certain
keywords. A Query With List enables you to determine categorical values, among other things. For example, for three
different report types (daily report, weekly report, monthly report), the type occurring in the respective document can be
stored in a placeholder named Report Type and used for the name, etc.
The default setting Text Block covers all subsequent characters of the text block adjacent to the search word and is sufficient
in most cases. However, if the text block overlaps into an unwanted adjacent data range, you must switch to the First Character
setting. With this setting, only the first visible character of the text block is used as the extraction result - so the data
range must be extended here in almost all cases using the tab Extend Data Area next to it.
The preview located below the configuration area shows the currently extracted value.

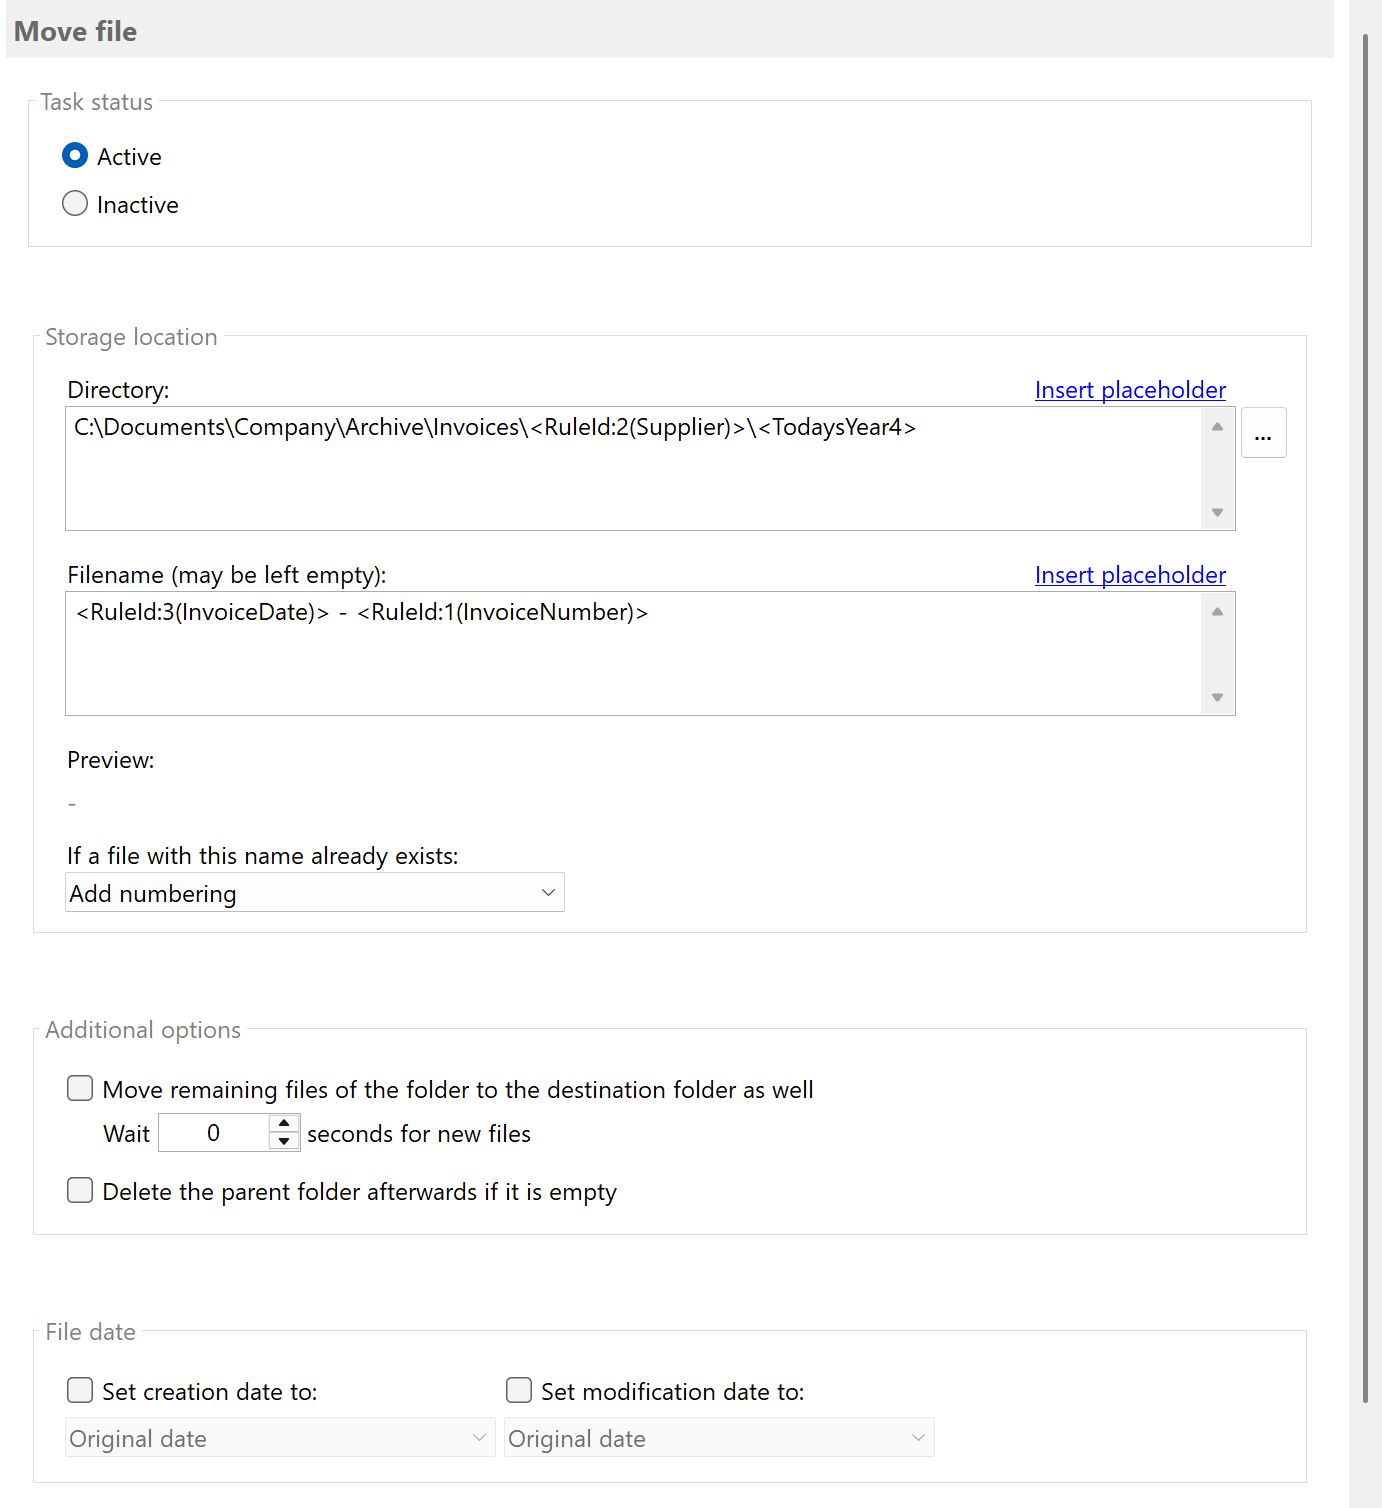
Activate and configure the task Move File
Select the task type Move File and set the task status to Active.
Next, determine the base directory for the storage. Then, you can use previously defined placeholders in the fields
Sub-folder and File Name. Placeholders can contain, for example, properties of the PDF file or data extracted from
the document text, such as an invoice number or invoice date. To select a placeholder, click the link of the same
name above the input field File Name and select the corresponding menu item.
Example: Organize by supplier and year
Configure path placeholders to automatically sort files into subfolders:
- Base directory:
C:\Archive\Invoices
- Sub-folder:
<RuleId:1(Supplier)>\<RuleId:2(InvoiceDate){Year4}>
- File name:
<RuleId:3(InvoiceNumber)>
Result: C:\Archive\Invoices\ACME Corp\2024\INV-12345.pdf
If a file with the same name already exists, you can specify how the program should behave. For example, select Append
Numbering or Cancel Operation.
The program can optionally adjust the modification date or the creation date of the moved file.
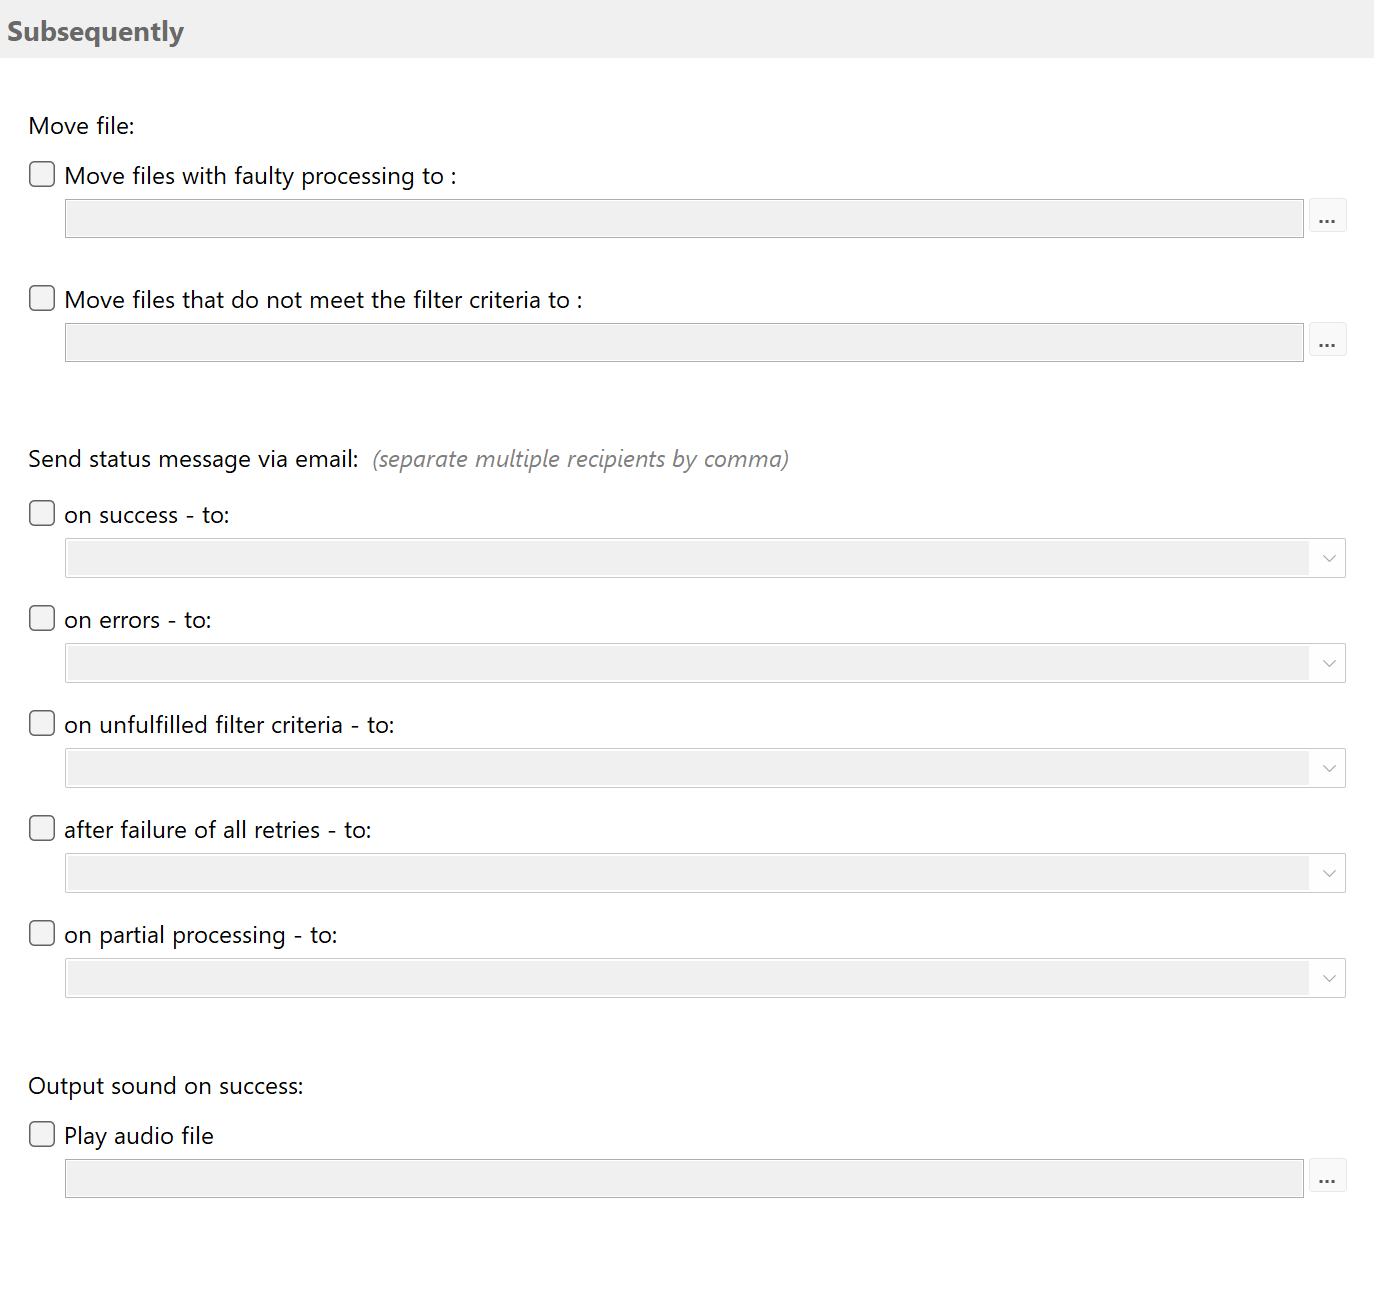
Status notifications
In this category, you can specify whether status messages about the processing of each PDF document
(success, error, no match, no text, ...) should be sent to a specific email address. Automatic PDF Processor can send
this email via:
- the default Outlook email account
- an SMTP server
- or Exchange Online.
Result
After completing this configuration, your profile will automatically:
- Monitor the specified folder(s) for new PDF files
- Check each file against your filter criteria (if configured)
- Extract data from matching PDFs using your extraction rules
- Move files to the target folder structure based on your placeholders
- Create subfolders automatically if they don't exist
- Log all operations in the main window for review
Tip: Use the Catch-up function in the toolbar to process existing PDF files
that were already in the folder before the profile was created.