Print ZUGFeRD and XRechnung files automatically
Even when e-invoices are processed electronically, a printout is often needed in everyday work - for the paper filing, for approval or as a working copy. This how-to shows how Automatic X-Invoice Processor prints incoming e-invoices fully automatically: ZUGFeRD PDFs directly, XRechnung XML files as a neatly formatted, readable visualization.
At a Glance
- Difficulty: Beginner
- Time required: about 5 minutes
- Prerequisites: Automatic X-Invoice Processor installed; a printer (physical or PDF printer); a folder where e-invoices arrive
- Task used: Print file
Video tutorial: Automatically print invoices (with narration and optional subtitles)
Step 1: Create a profile and choose the mode
- Click New profile… in the profile toolbar and enter a name under General (e.g. “Print incoming invoices”).
- Under Mode, choose the appropriate processing mode: Process PDF file (ZUGFeRD) for ZUGFeRD/Factur-X PDFs or Process XML file (XRechnung) for plain XML invoices.
- Under Monitored folders, add the folder where your e-invoices arrive.
The basic setup of a profile is described in detail in the how-to “Getting started”.
What is printed depends on the mode:
| Mode |
Printed document |
| Process PDF file |
The ZUGFeRD/Factur-X PDF itself |
| XML modes |
The automatically generated, readable PDF visualization of the invoice data - with sender/recipient, line item table, totals and payment information (see chapter 12) |
Step 2: Add the “Print file” task
Click Add in the task list and choose Print file.
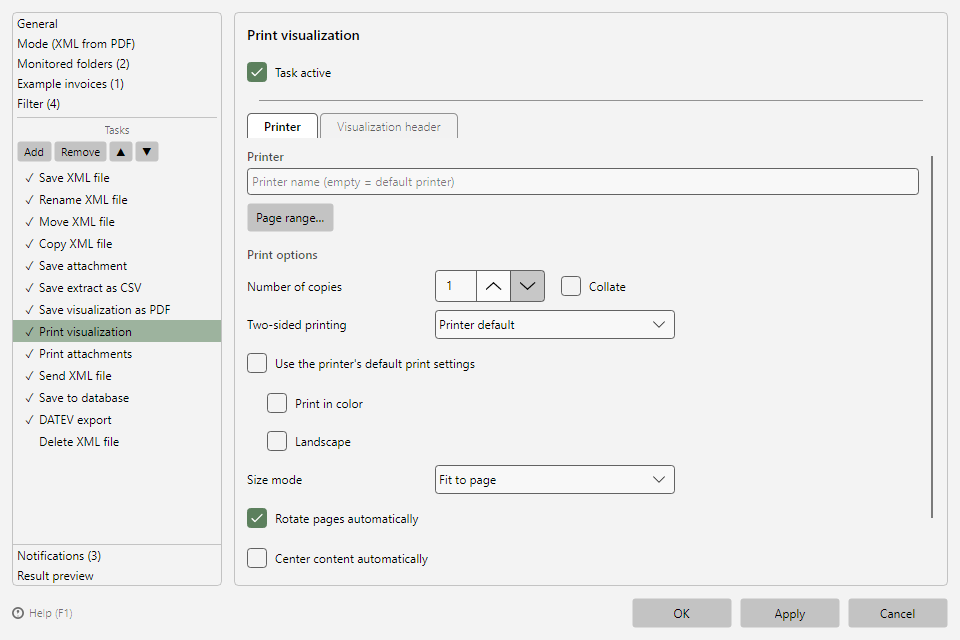 Print file task with printer tab
On the Printer tab:
- Enter the printer - if the field is left empty, the Windows default printer is used.
- Adjust the print options if needed: copies, collate, color, duplex, orientation, size mode. The defaults come from the print presets in the program options (see chapter 40.10) - configured there once, all new print tasks start with your house settings.
- Via Page range… you restrict printing to certain pages - e.g. only the first page of long invoices.
Tip - printing to a file: With Save as file via PDF printer, the print output is not printed physically but stored as a PDF file - with output folder, file name pattern (placeholder support) and conflict behavior.
Step 4: Filing after printing
So that printed invoices do not remain in the inbox folder, add Move file as a further task and move the file to an archive - with placeholders in the target path, e.g. a year subfolder <InvoiceYear> (see chapter 19).
Behavior on printer problems
Before printing, the program checks whether the printer exists and is ready. On problems, an error entry is created in the processing log - the file is not lost and can be printed again after the fix via Process file again in the context menu. If a printer driver reports incorrect status values, the extended availability check can be simplified in the program options under Miscellaneous (see chapter 40.16).